Cutting boards are one of the easiest projects to start out with when it comes to woodworking. You don’t need many tools and can make it as complex or simple as you’d like. It offers a versatile tool that can be used everyday and, if done correctly, can last for a long time. Here’s our basic guide for how to make your own cutting board.
Tools to use: Clamps, orbital sander, circular saw, jigsaw (optional), laser engraver (optional), router (optional)
Step 1: Gather Hardwood
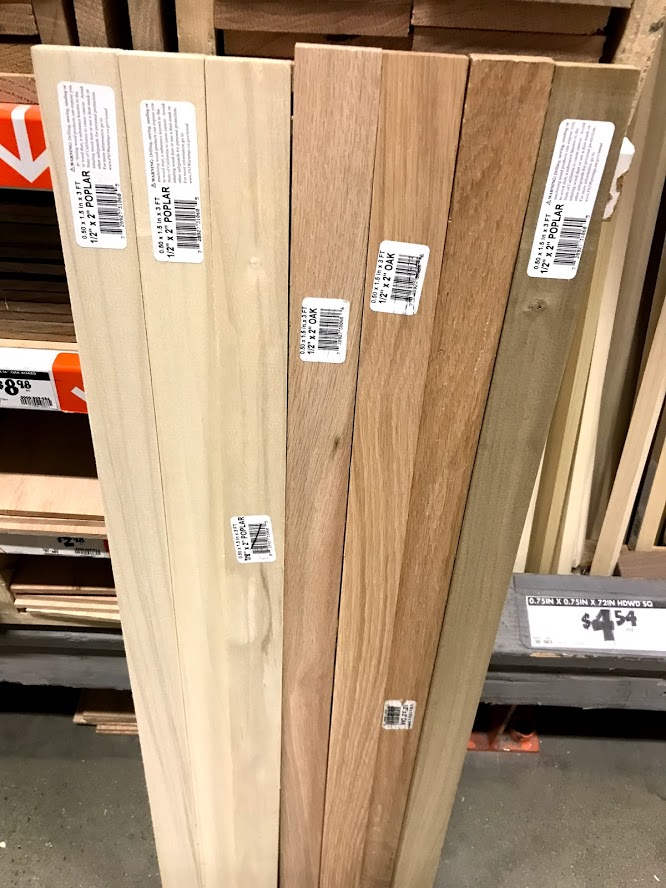
There are many different places to get hardwood from, including local hardware stores, lumber yards, or even online retailers. The most important thing here is to make sure the wood is actually hardwood, as this will help the cutting board stand up over time. The easiest way to start is to choose stock material that’s already at the thickness you want the cutting board to be. You could also choose thicker material, however this could require a band saw, planar or table saw to get to size.
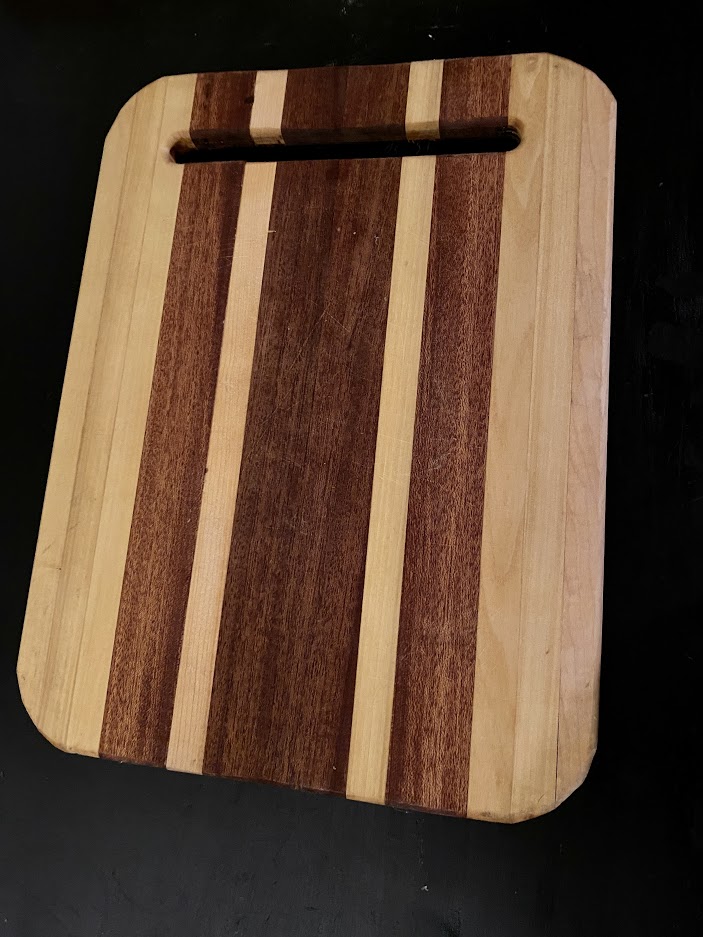
The dimensional hardwood at a hardware store usually works well for simple cutting boards and can easily be made unique by mixing together different wood species. A simple gradient of wood like the example below is a great pattern to start with.
Step 2: Glue Up the Stock
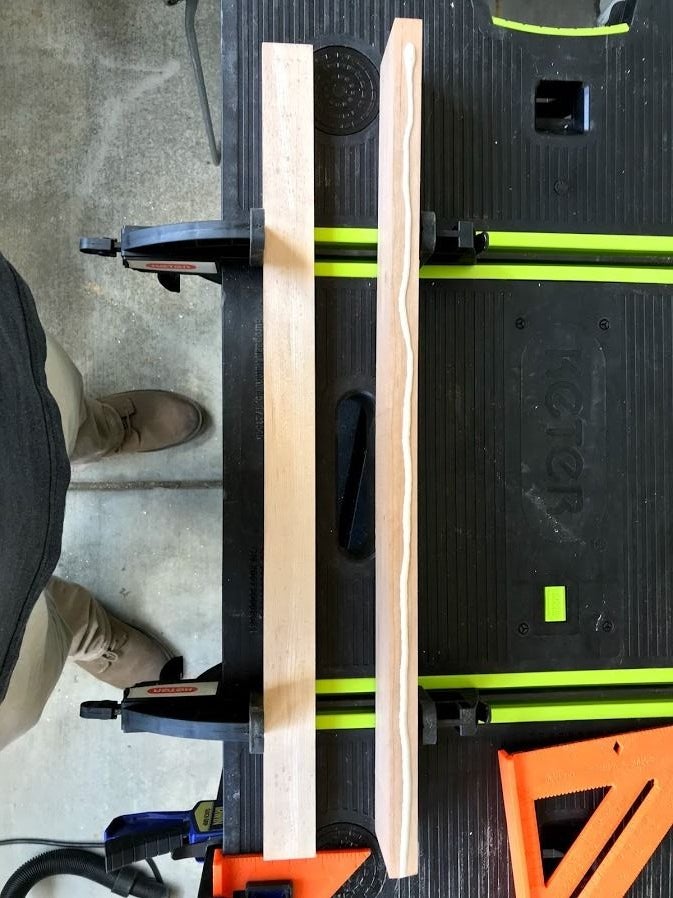
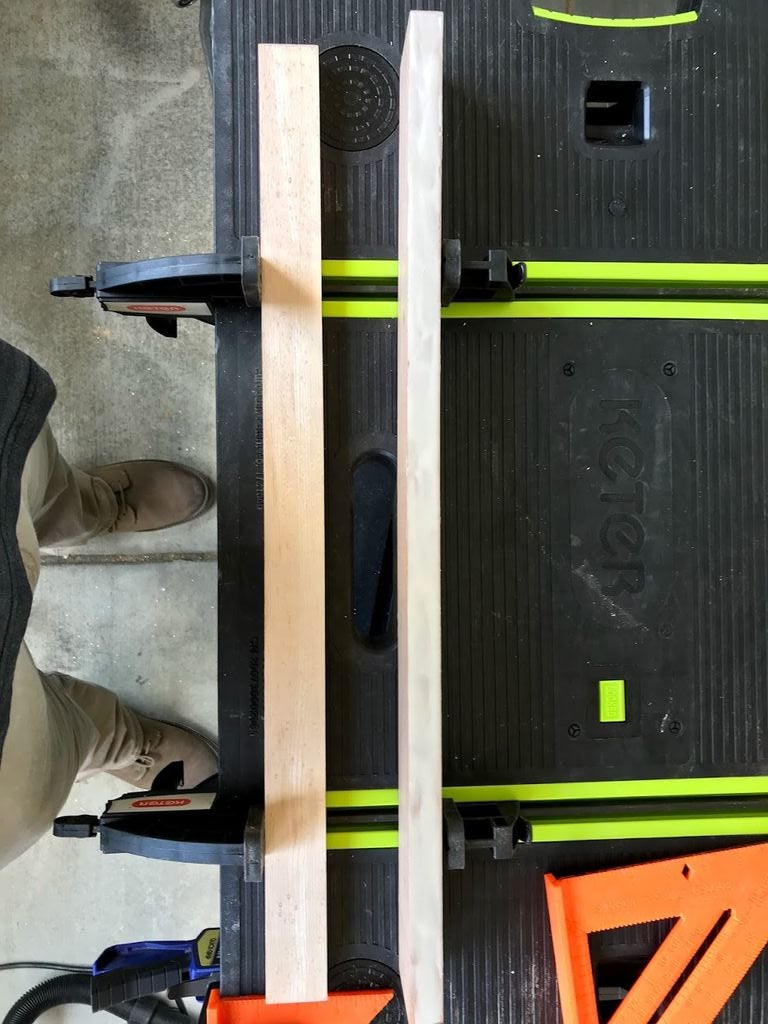
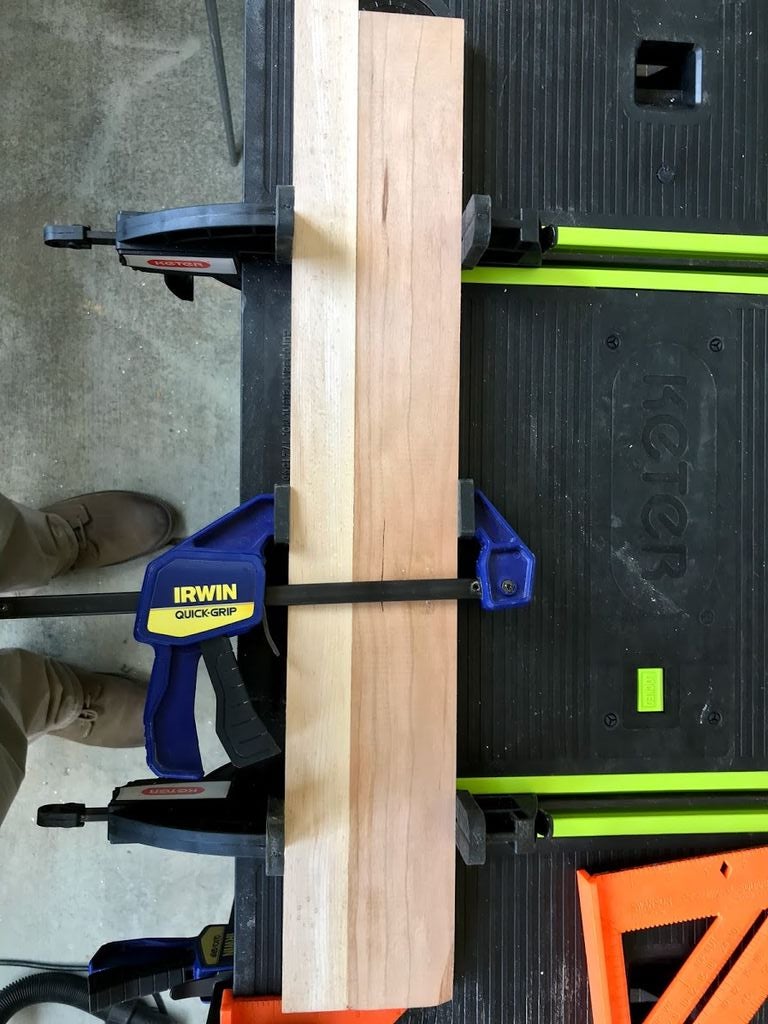
Once you figure out a pattern you like and have your wood, the next step would be to start gluing the boards together. If the wood is too thick though this could be a good place to plane it down to size. This might make things easier later but isn’t necessary.
When choosing glue you want to use something that’ll stand up to continued use and is waterproof. Titebond III fits both these requirements so it’s a good choice. Start out by laying out your pattern of wood. Then put glue on the edge face of one of the boards and smooth out the glue over the whole surface. Make sure to not miss any spots or else the boards may not properly bond. Once the glue is applied, use clamps to hold the boards together. The more clamps the better in this case to make sure the boards are properly glued together. Leave the boards in the clamps for at least an hour (or whatever the glue bottle recommends), then repeat with the other boards until everything is glued together. Try to keep the boards flat on a table or surface to avoid extra work later and wipe off any excess glue that squeezes out of the joints.
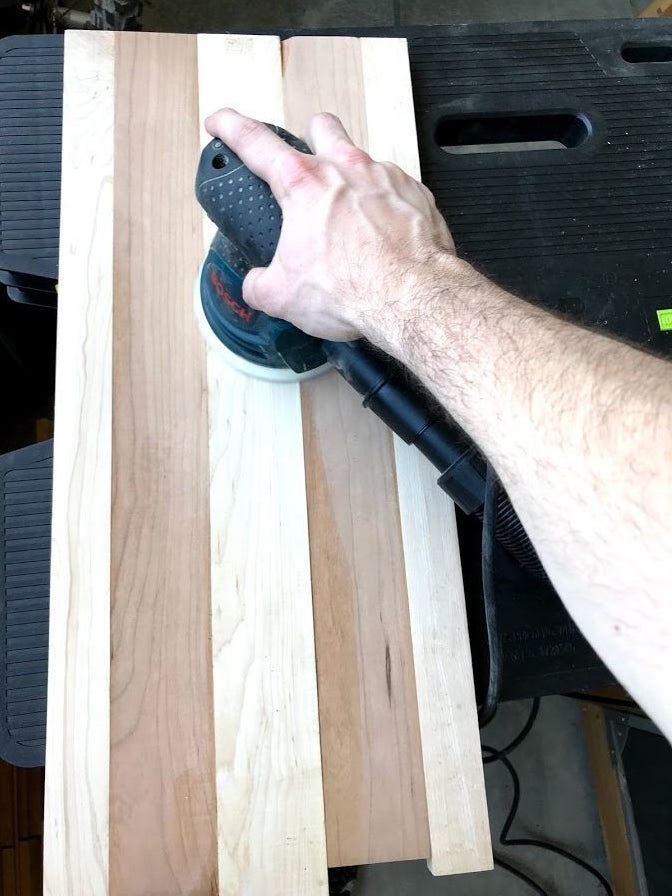
Step 3: Sand Down the Boards
Chances are your boards won’t be exactly the same height in all places. To fix this, the easiest thing is to throw the board through a planar a few times, but don’t worry if you don’t have this equipment. A simple orbital sander is a easy replacement, however it will take some time depending on how uneven the boards are. The best thing to do here is start at a low grit pad (i.e. 40-80), then sand the board until the transition spots between boards is smooth and even. Make sure you’re patient at this step as it’ll determine how nice the board is in the end. Keep sanding with increasing grit pads. You can probably stop around 220, or when the board feels soft and smooth to the touch.
Step 4: Cut the Board to Size
Once everything is sanded, you can cut your board to size. This can be done easily with a circular saw and a straight edge. The size is up to you, but 16″ to 24″ for the length is usually a good size.
Step 5: Add Extra Features
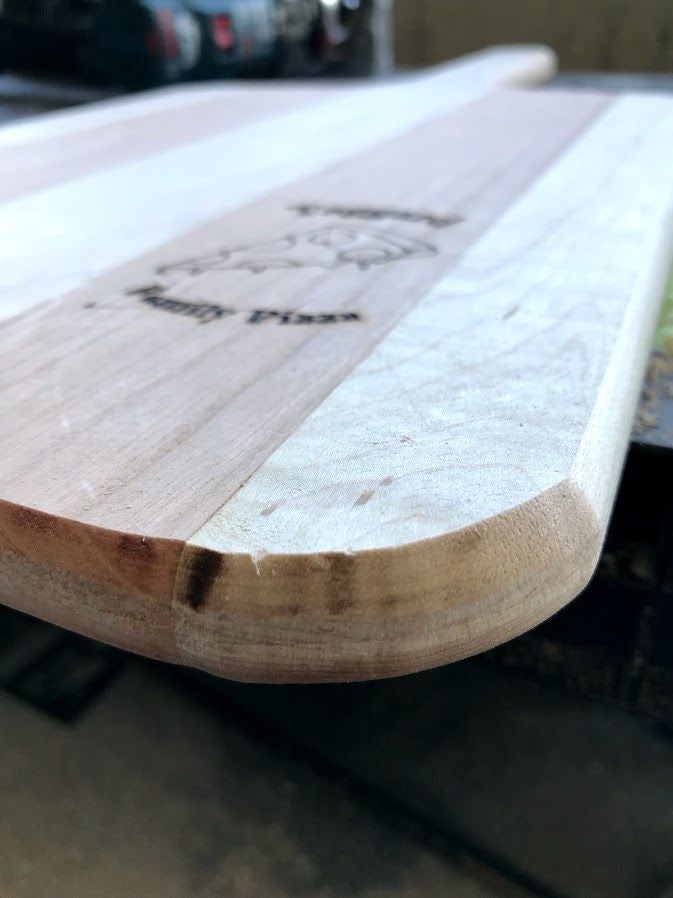
At this point you’re almost done with your board! A nice feature to add in is a handle or juice groove. For a handle, sketch out a placement and then use a jigsaw to get the general shape. Make sure the slot is wide enough for someone’s hands to fit through. You can then use a router (or use the sand paper) to apply a round to the edge of the handle, along with the rest of the board perimeter. This gives the board a clean look and makes it soft to the touch. For the juice groove, map out where you want the path to be and use a router to cut out the groove. For this instance, a plunge router would be the easiest tool to use, however a CNC could provide a precise placement of the feature. It’s a good idea to sand down all the edges once more as the router can roughen up certain sections.
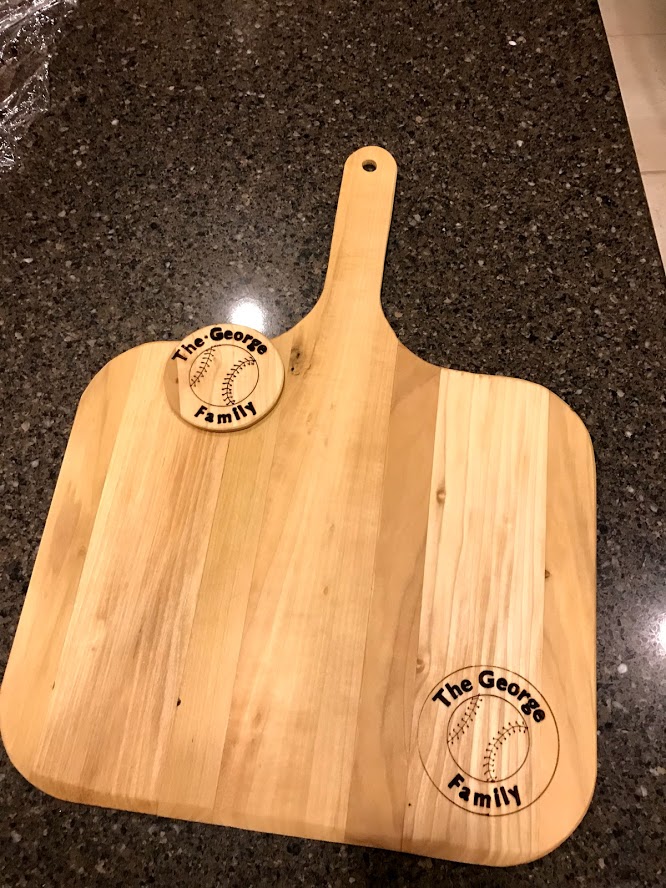
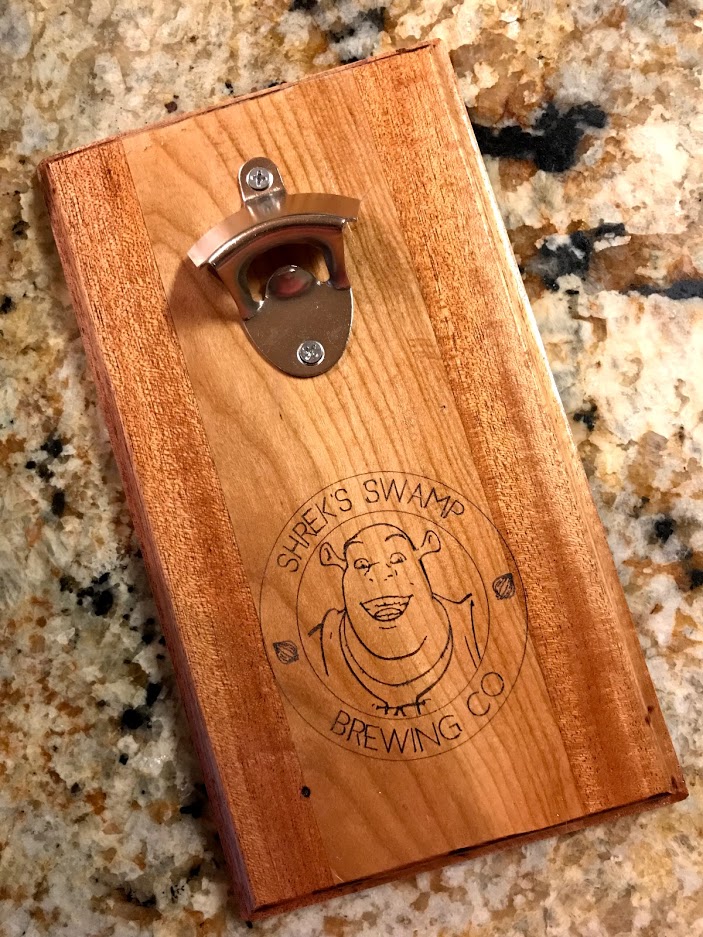
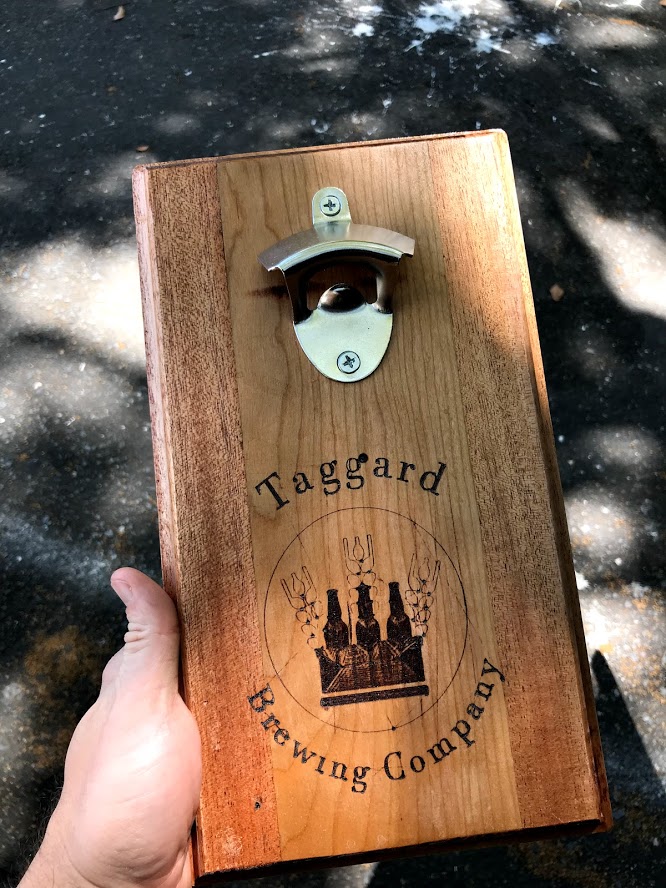
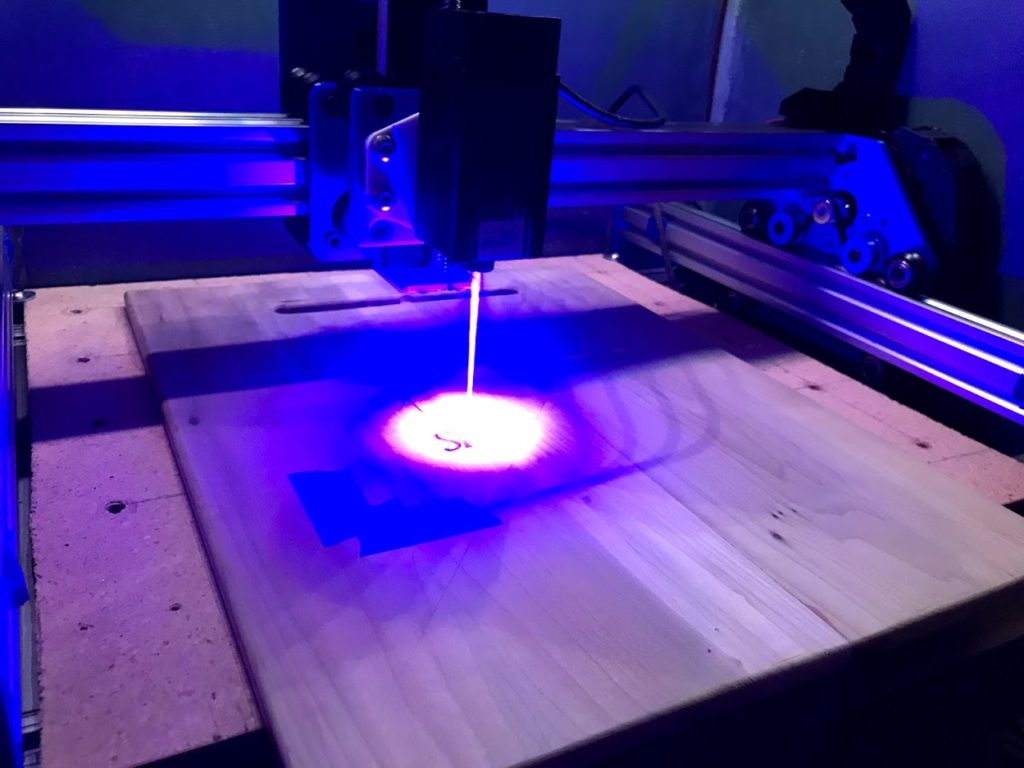
Another feature you can add in is a personalized message or picture. This make the cutting board even more unique, but would require access to a laser engraver so is a little more advanced.
Step 6: Apply a Finish
One of the last steps for your cutting board is to apply a finish. When selecting a finish, make sure it’s food safe since it’ll be in contact with foods of course. A good option is a danish oil, which can come in a variety of colors and wood finishes. Again, choose something you think will look nice and complements the design of the cutting board.
Step 7: Enjoy!
You’re done now! Hopefully you’ve made something you can be proud of to use everyday or give away as a gift to friends or family. Hopefully this guide can be of use to you with your own cutting board projects. These steps can easily be adapted to a variety of different projects too, such as a pizza peel, mounted bottle opener and more! Of course once you make once cutting board your world will be open to many more designs and advanced techniques.