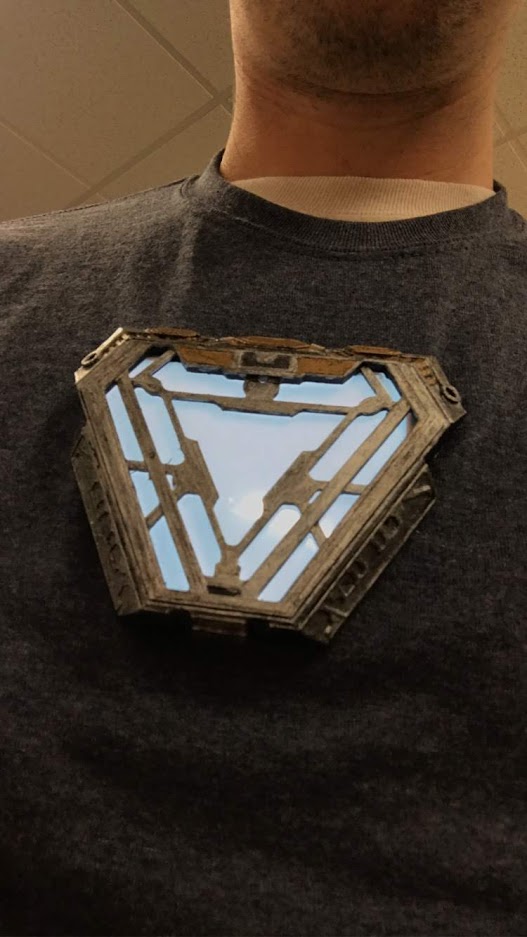
This project was based on the Iron Man arc reactor from Avengers Infinity War and Endgame. It was designed fully in Autodesk Inventor and uses EL paper as the main light source. The files for the model can be found here in our shop and serve for a great weekend project.


Supplies Needed
Instructions
- Start by printing out the 3 files (Base, Cover, and Back Plate) using a 3D printer.
- Use your favorite paints to color the parts (Base and Cover). The example shown here uses a variety of acrylic paints with many coats to get the metallic look. Apply some weathering techniques as well to make the parts look worn and more metallic. This step will take some time and it is up to you how much detail you want to put into the paint job.
- Cut the EL Panel to size using the EL Paper file. Make sure it fits within the cavity of the Base. Do not cut near the electrical connection area as this is what makes the paper light up. The Base features a cutout in the upper left for the wires to be threaded through.
- Use some super glue or hot glue to hold the EL Panel in place on the Base. Also apply some hot glue as needed to keep the wires coming out of the back of the Base from moving around too much.
- Wire the battery connector to the switch and open connector of the EL Panel. Test the connections to make sure the EL Panel lights up.
- Glue magnets in the back of the Base and Back Plate. Make sure the magnets are placed in the correct orientation so they’ll attract to each other.
- (OPTIONAL) Cut a small hole in a shirt to run the wire down through. For the example shown here, the battery, switch and EL panel controller are taped together and held in the wearers pocket.
- Wear your new prop and show off your hard work!