Feed your dog (or other pet) with a simple electronics setup that can be controlled using Alexa.
This project was originally posted on Instructables. Visit the post for a complete list of files
Overview
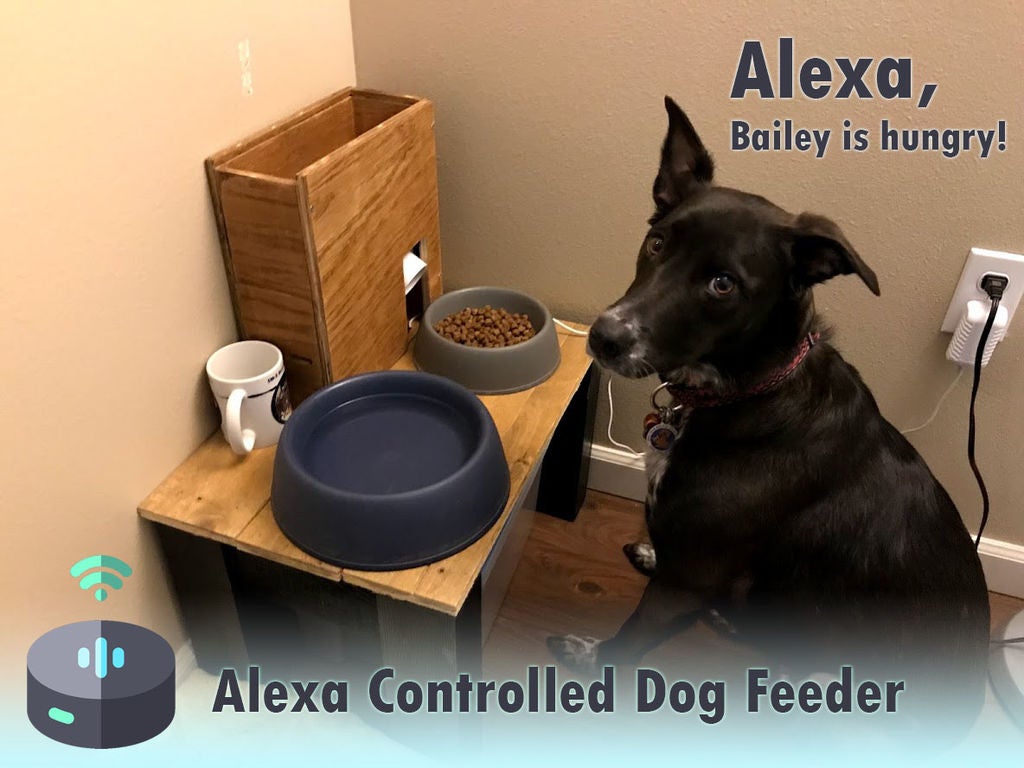


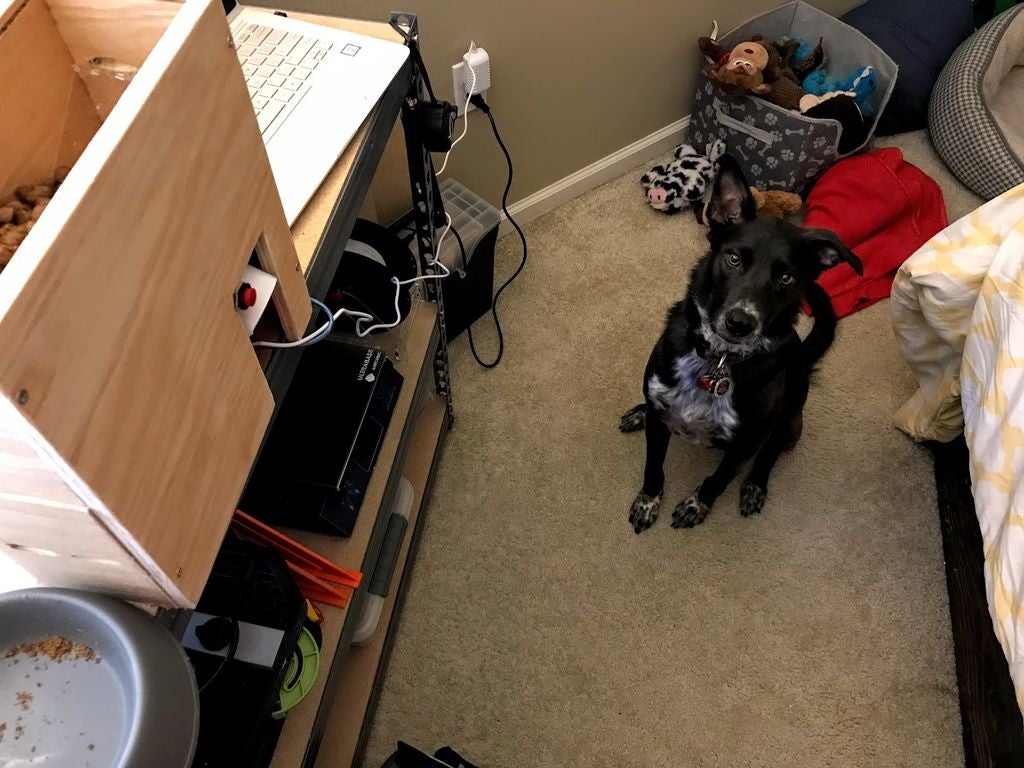
This is our dog Bailey. She’s part Border Collie and Australian Cattle Dog so sometimes she’s smarter than her own good, especially when it comes to telling time and knowing when she should be eating dinner. Typically, we try to feed her around 6 PM but this isn’t always easy if we’re away from home. The Alexa Controlled Dog Feeder was created as the perfect solution to feeding Bailey while we’re away from home to make sure she doesn’t get restless and can still keep to her schedule.
The code is based on this project from Bob at I Like to Make Stuff which takes care of the base code for communicating with an Alexa device. The nice thing about using Alexa as the main communication system is that it can be controlled using the Alexa app on your smartphone, eliminating the need for any complex servers or advanced coding. The supply list is relatively short and the entire project itself can probably be finished in an afternoon once everything is collected.
If you like what you see then please vote for me in the Pet Contest! I hope you find this Instructable helpful and let me know if you have any questions following along.
Step 1: The Design
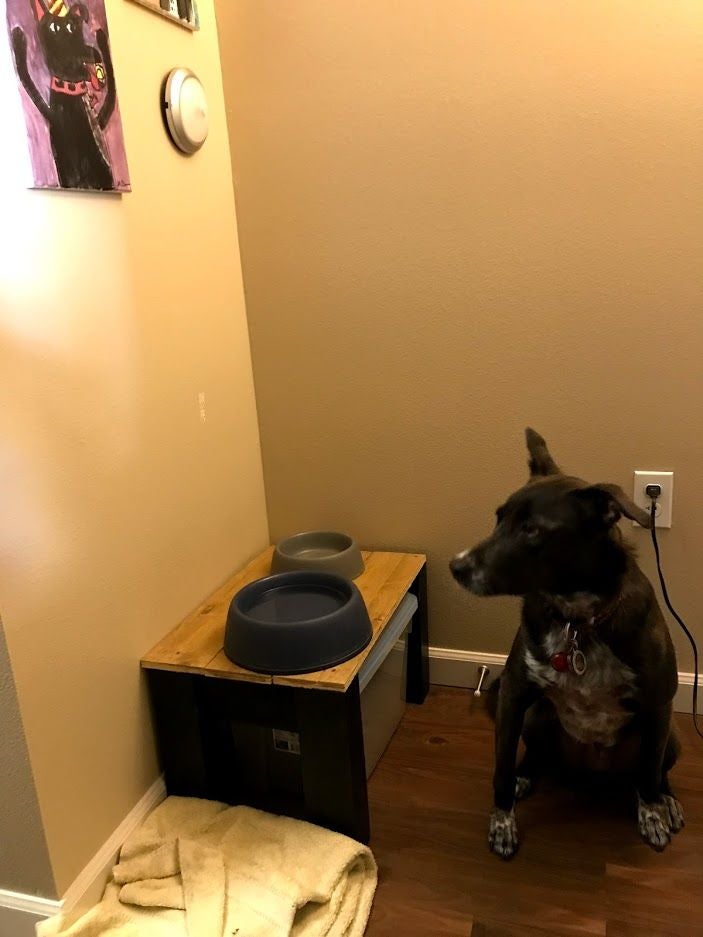
I already made Bailey a small food stand that’s a miniature version of our dining table for her food and water bowl to rest on. To optimize space I wanted the feeder to fit on this food stand and only hold a few servings of her food. The feeder is mainly supposed to be used for the small number of occasions when we’re not home so I don’t need it to fit a lot of food (just a few servings). If this doesn’t fit your needs then don’t worry as the dimensions can be scaled up or down pretty easily. The electronics will stay the same and you can adjust your feeder structure around them to fit your needs.
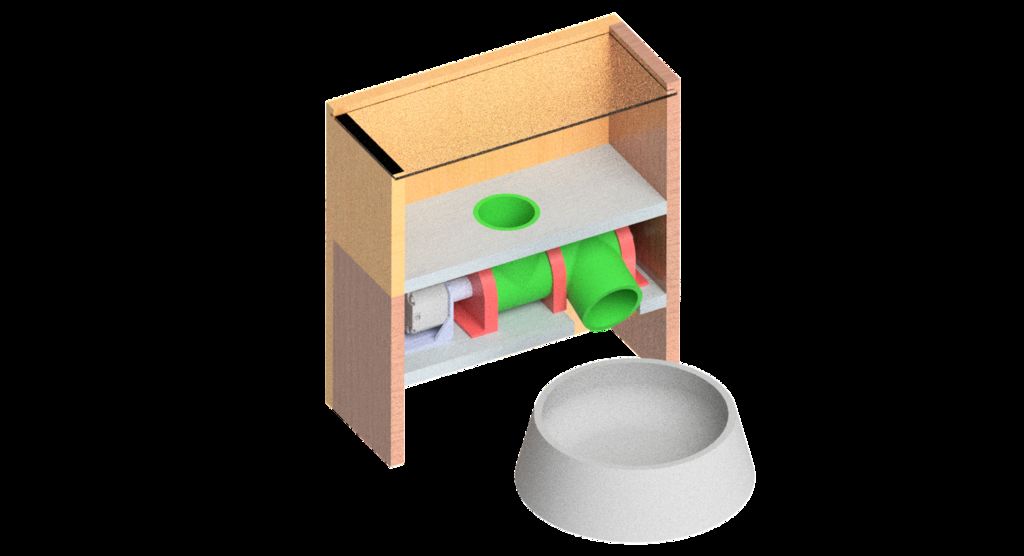
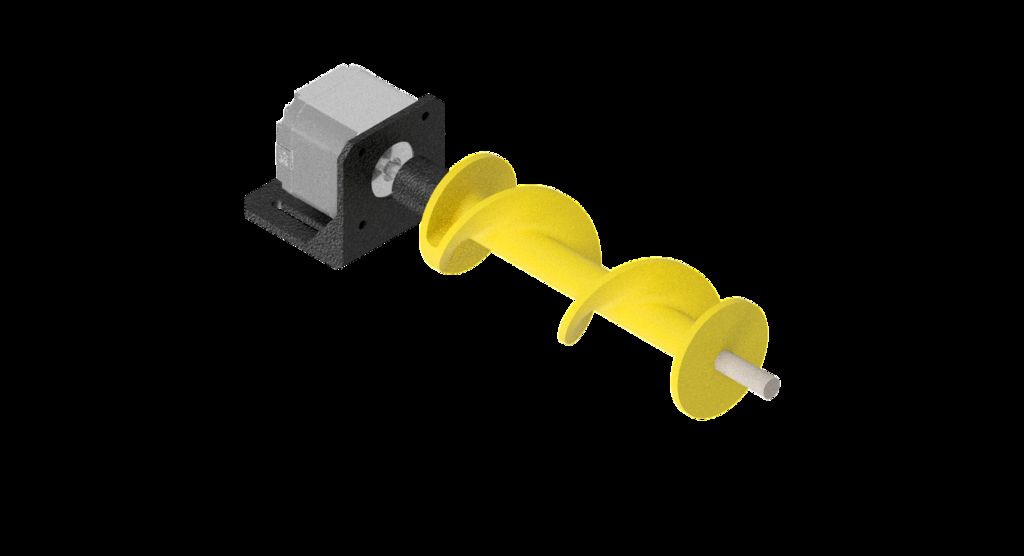
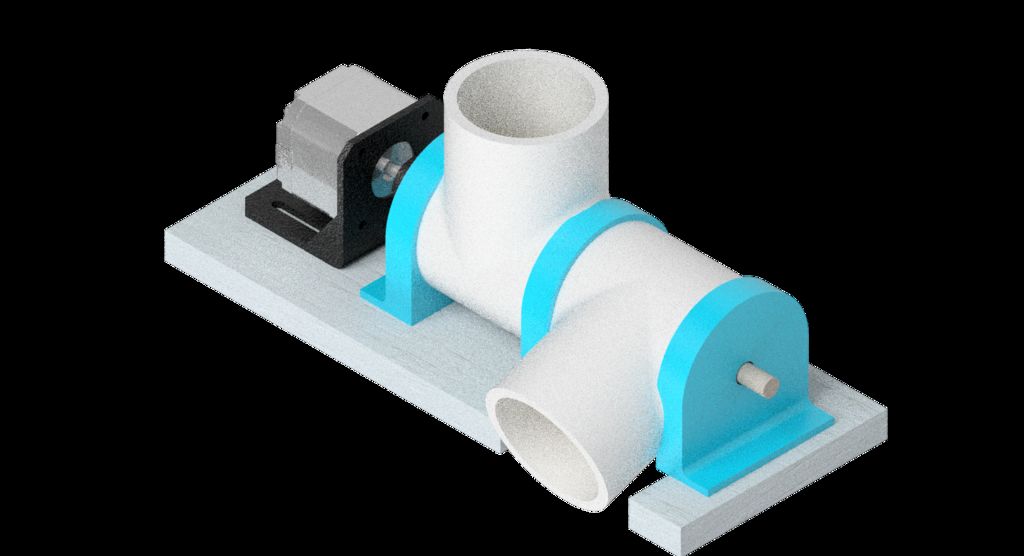
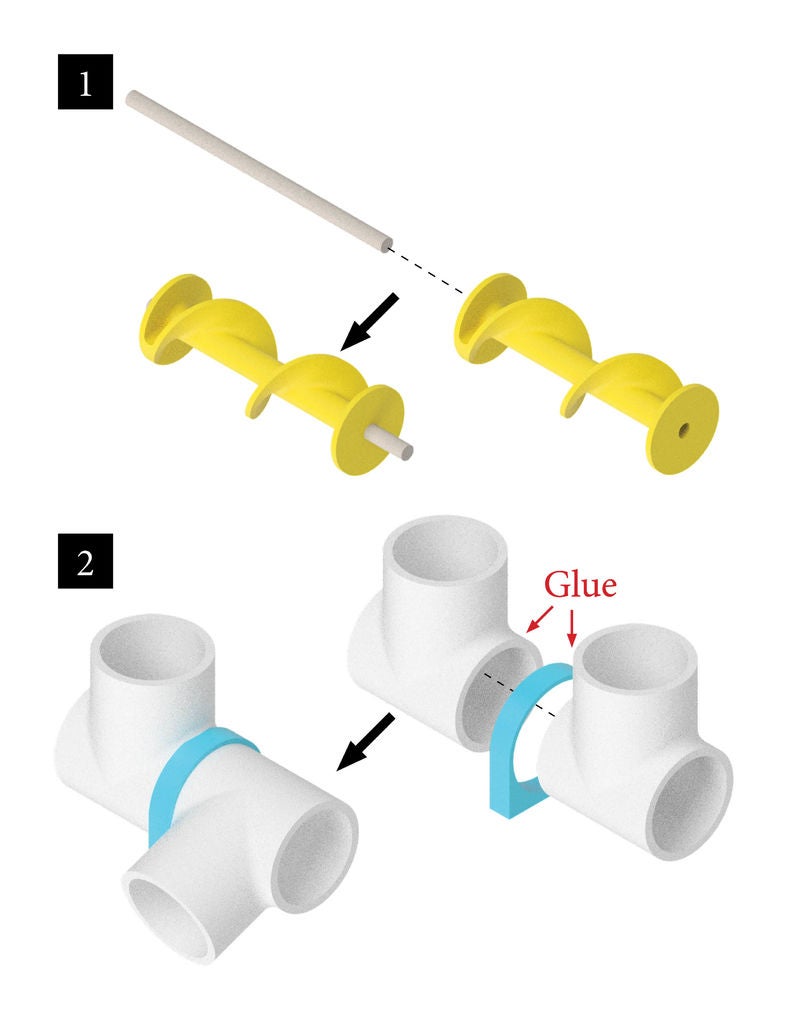
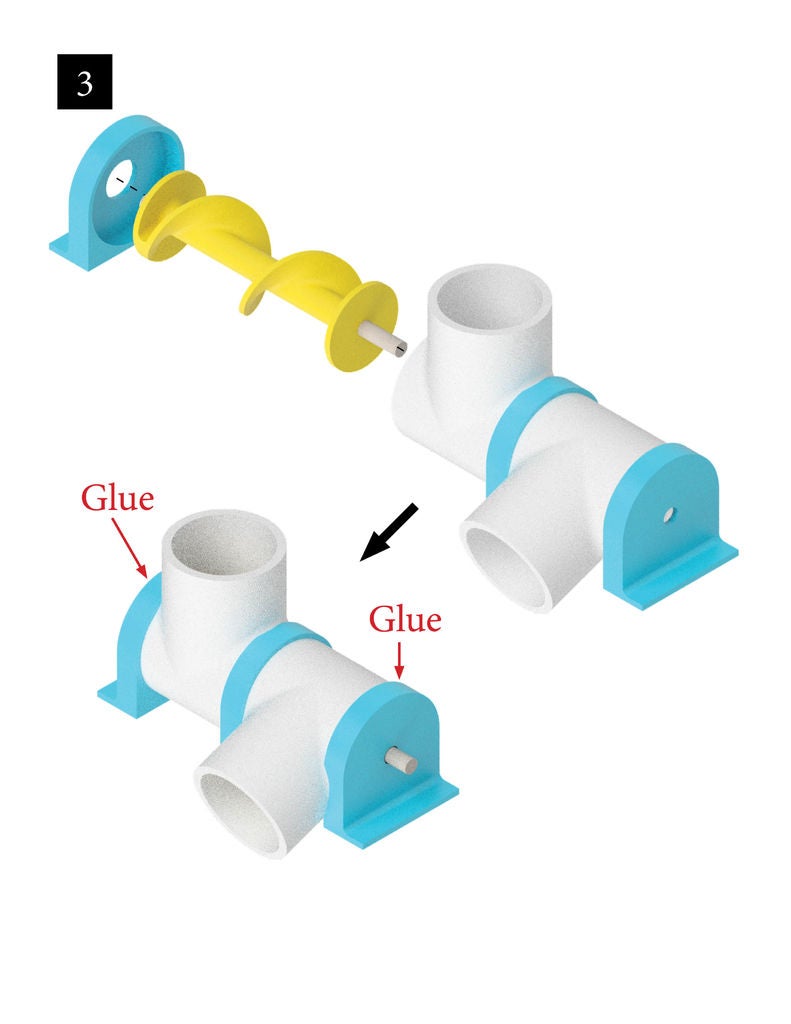
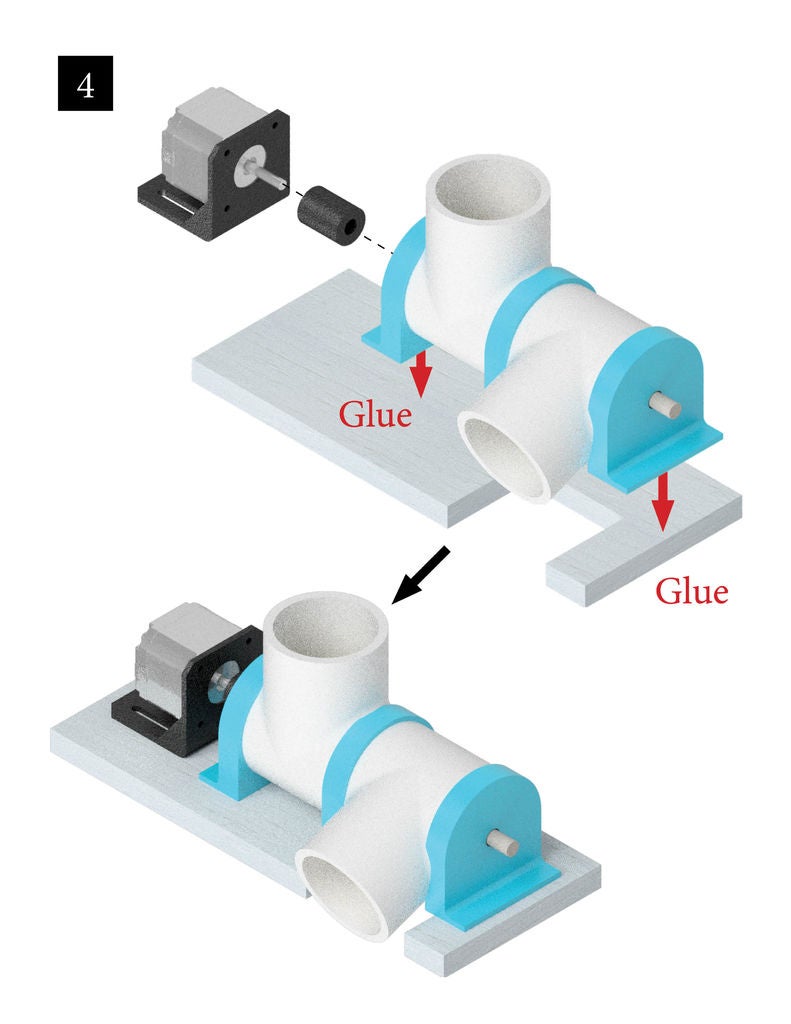
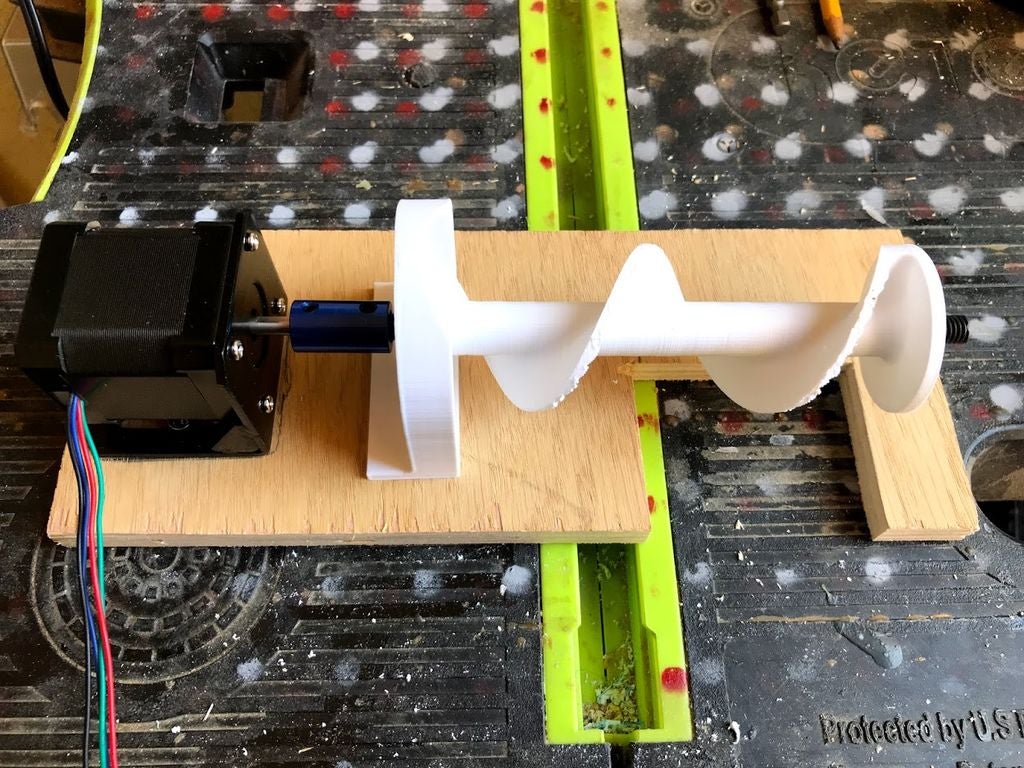
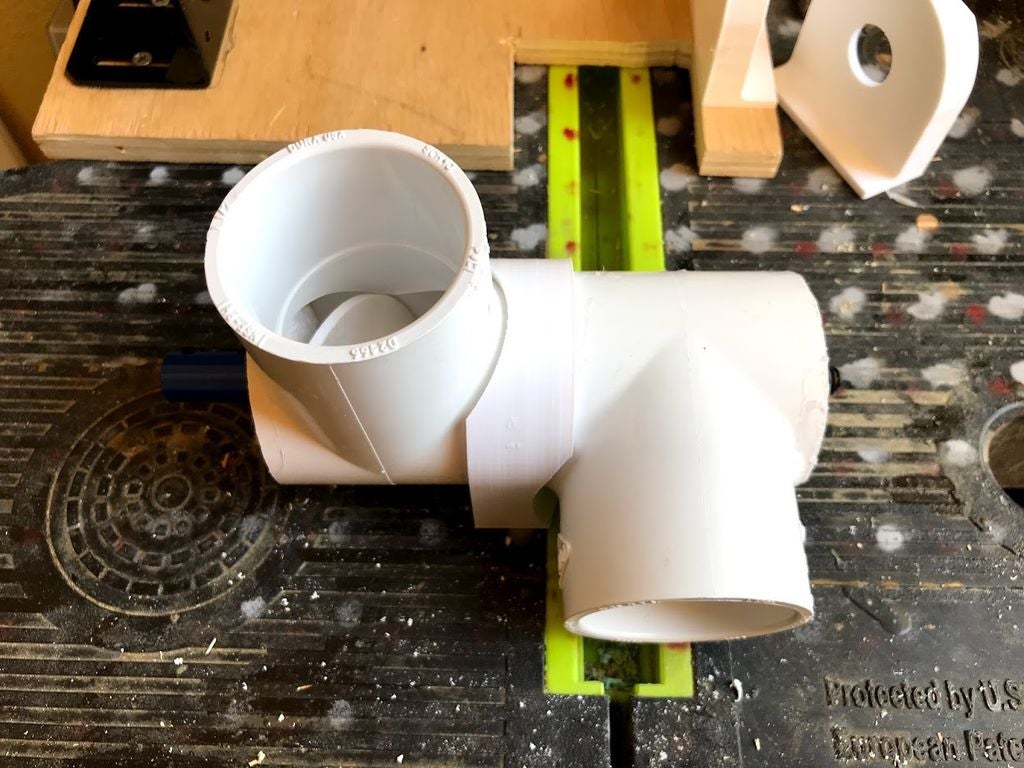
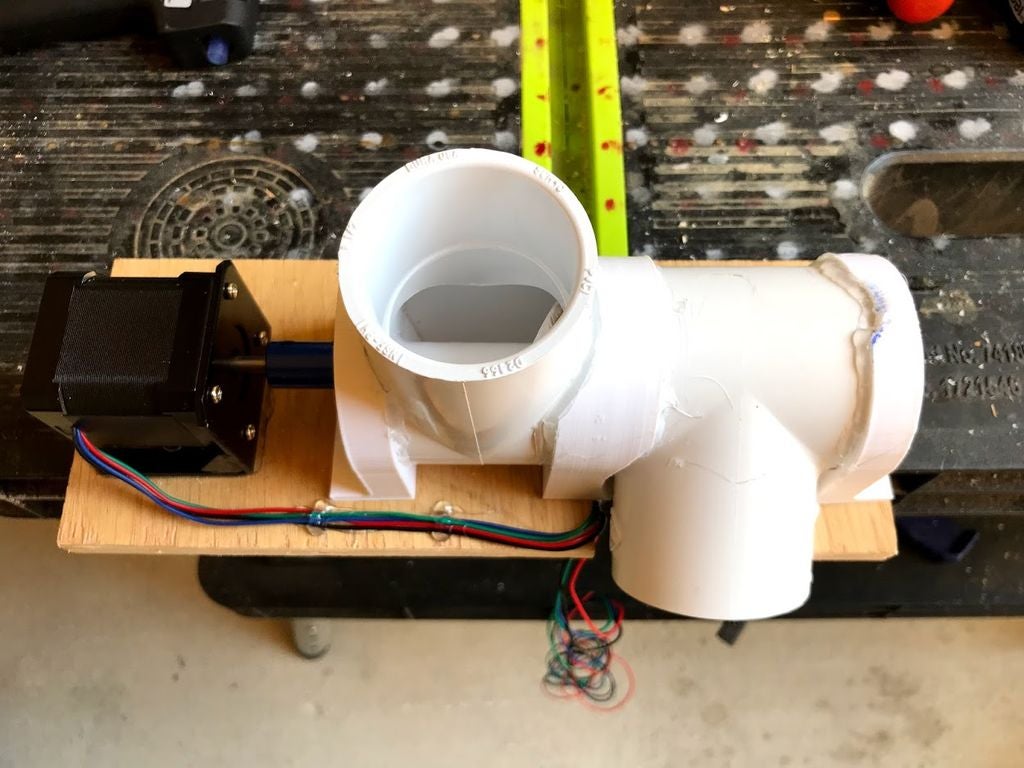
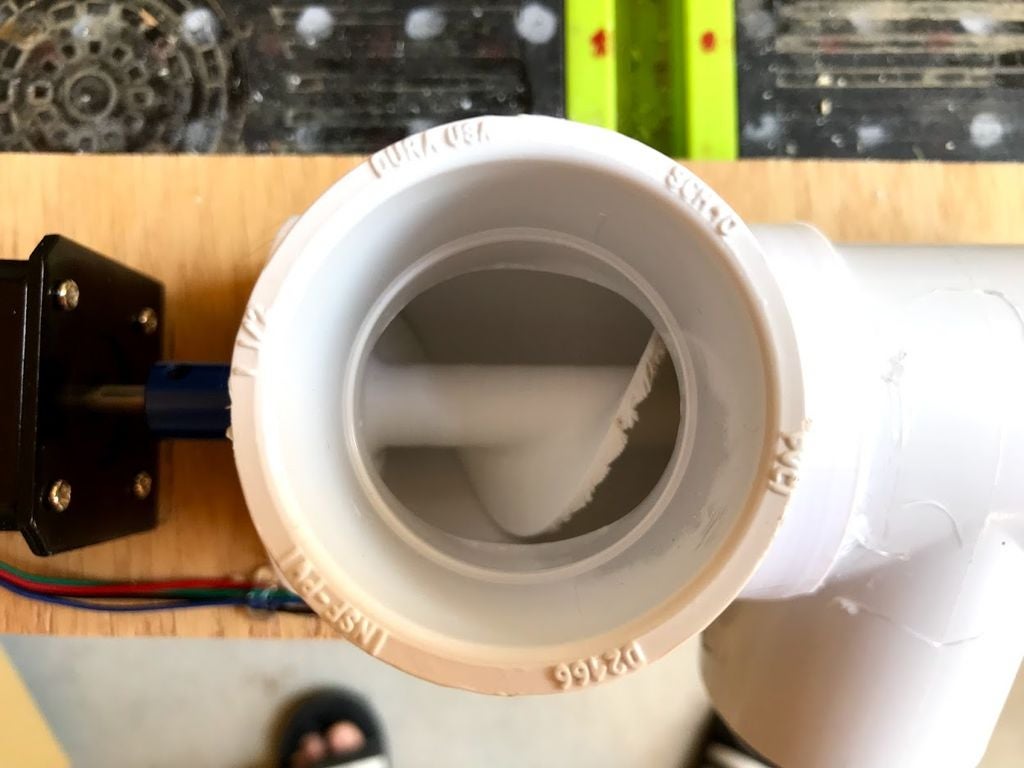
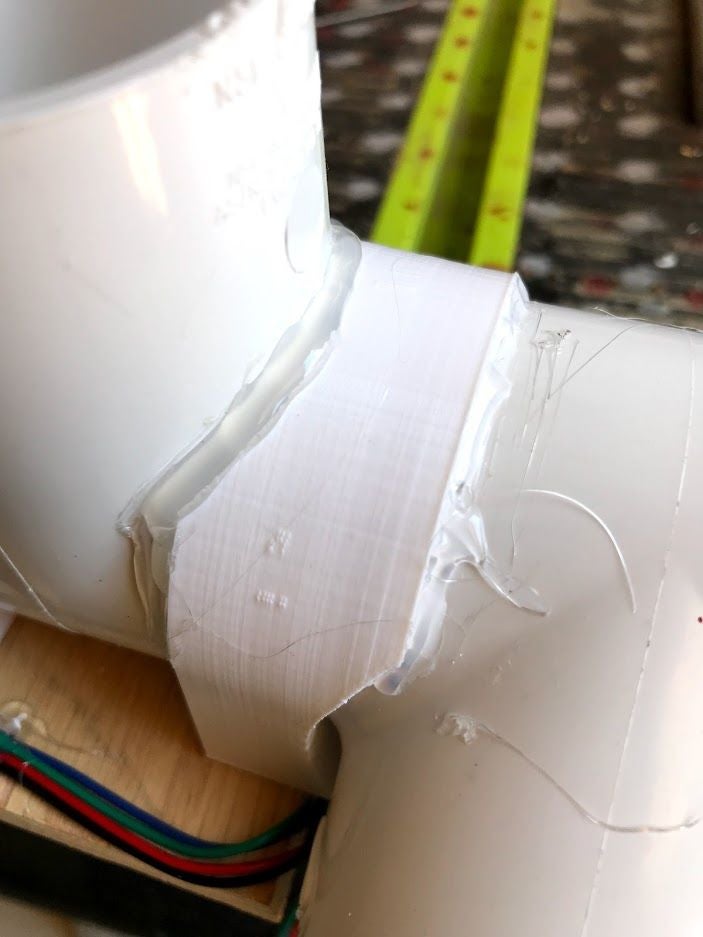
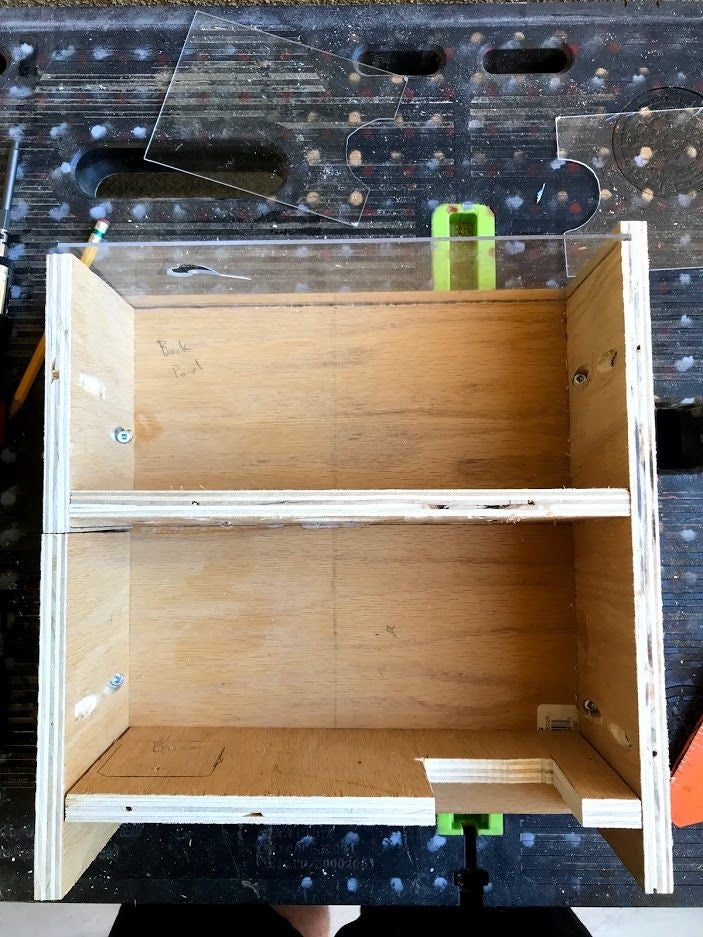
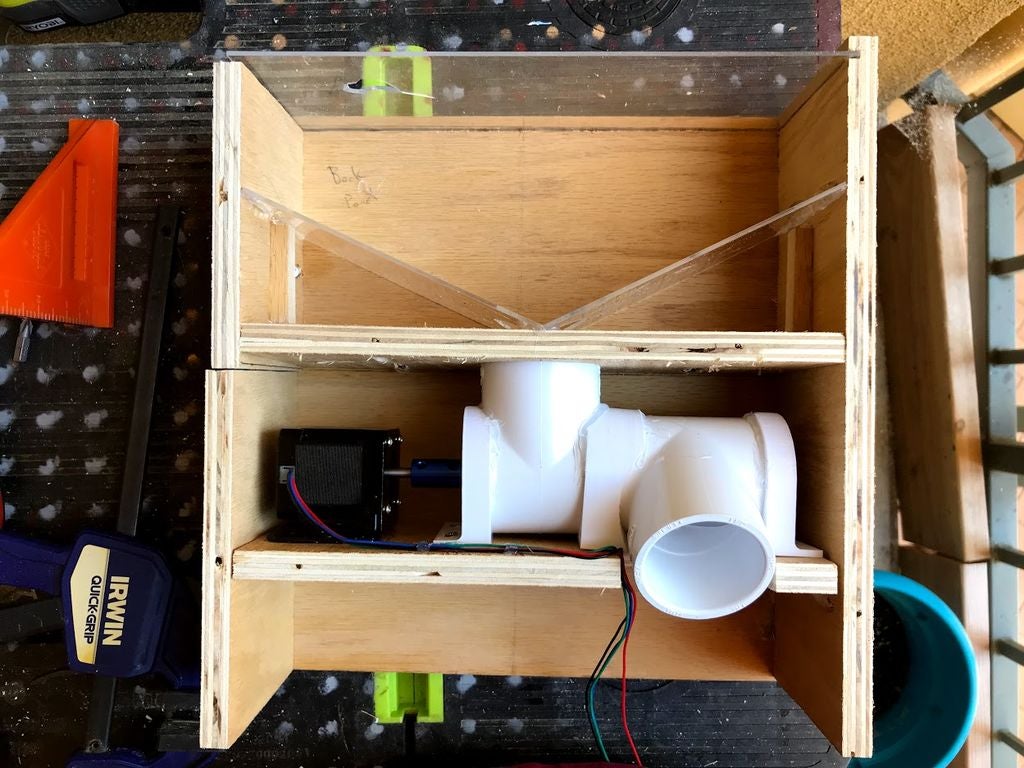
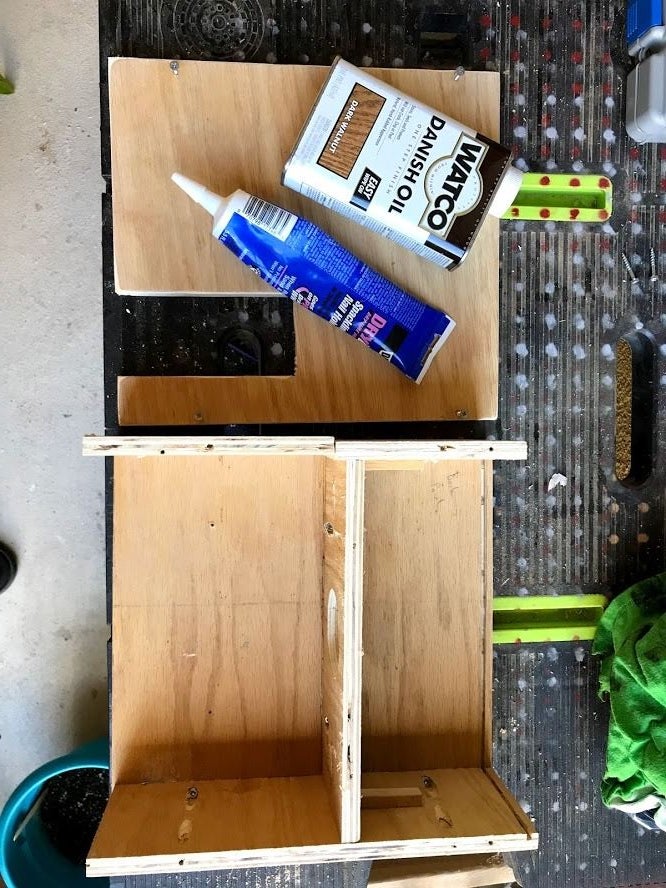
The structure itself is made up of two main chambers: one for the food and one for the electronics. The food will drop down from the containment area and into a PVC pipe. The PVC pipe is inside the electronics containment area which houses two PVC T-pipes with a motor and 3D printed auger running through the pipes. Once the food drops into the first PVC pipe it’ll be moved linearly by the auger until it drops out the second PVC pipe and down into the bowl. Upon testing the auger I’ve noticed it jams occasionally and causes the motor to stall. In future versions I plan on looking at this mechanism further to minimize this from happening. Again, the nice thing about this project is the main guts (i.e. electronics) can be adapted easily for whatever food delivery mechanism you decide on.
I chose to make the structure itself out of 1/2″ plywood I had lying around. The pieces are assembled using a mix of wood glue and pocket hole screws to make sure they’re secure. I also chose to use a leftover piece of acrylic for the top to make it easy to fill the food back up and see how much food is left.
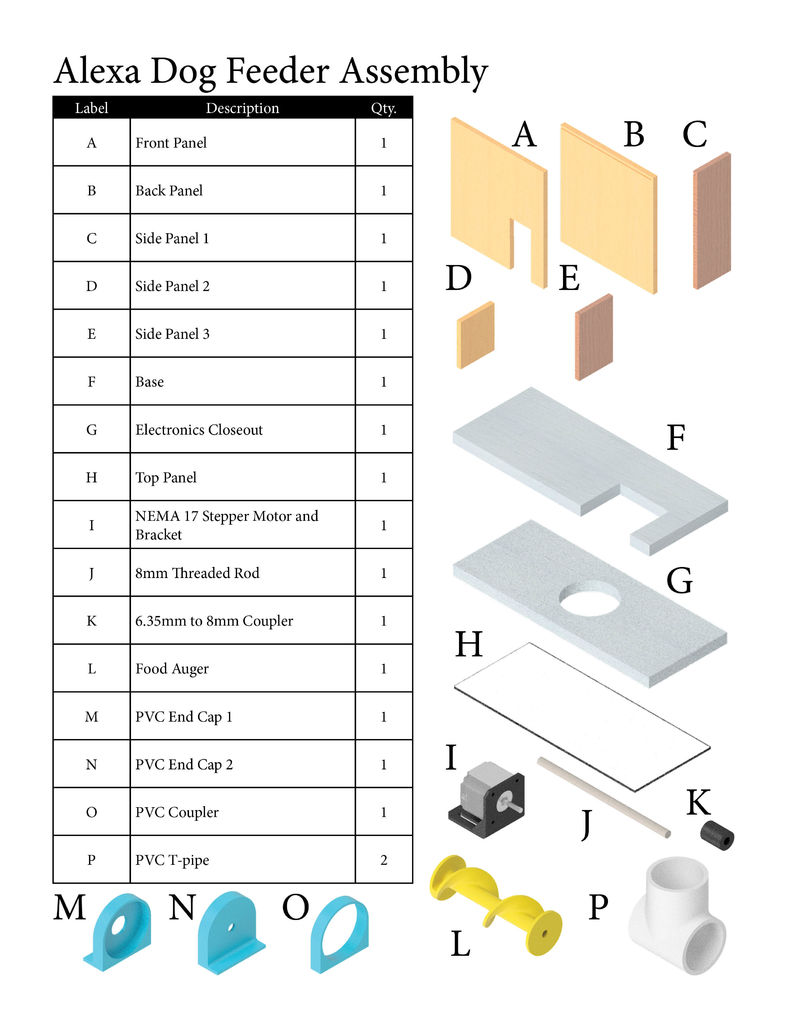
Step 2: Materials
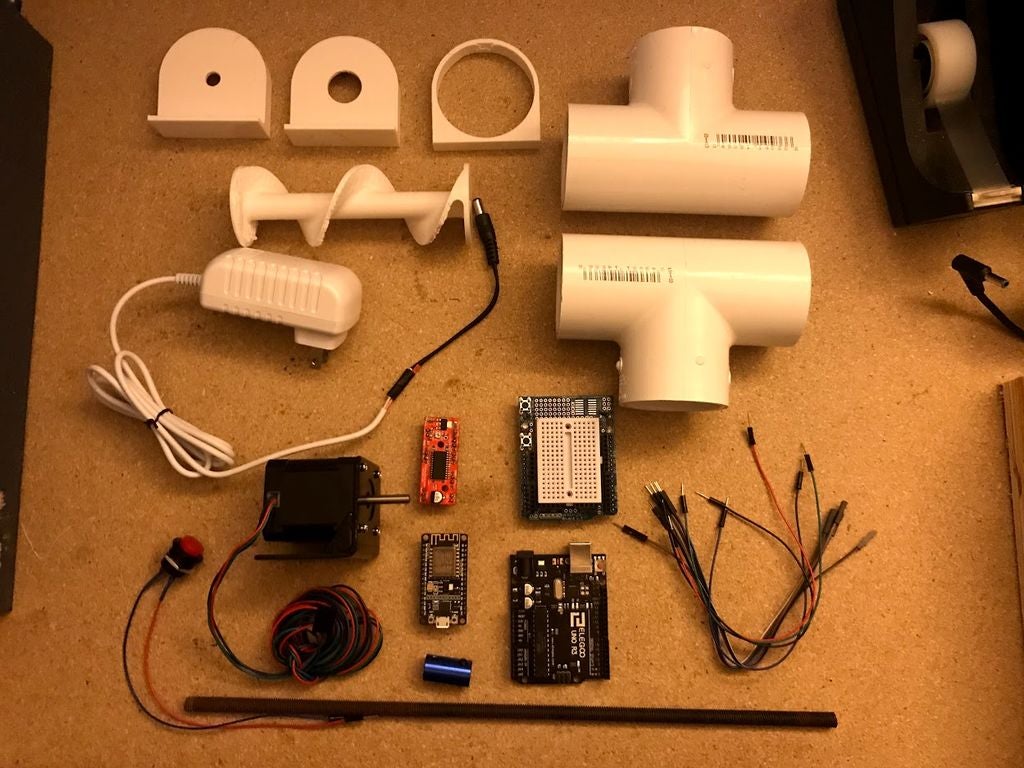
Most of the materials can be purchased from your local hardware store and Amazon for cheap. The exception for this is the PVC pipe supports that are 3D printed, however you could get creative with pipe mounts and end caps to avoid this. The PVC pipes also need to be cut down so they’re 2.75″ long in order to fit within the structure.
Materials Used:
1. 1/2″ Plywood
2. 1/8″ Acrylic
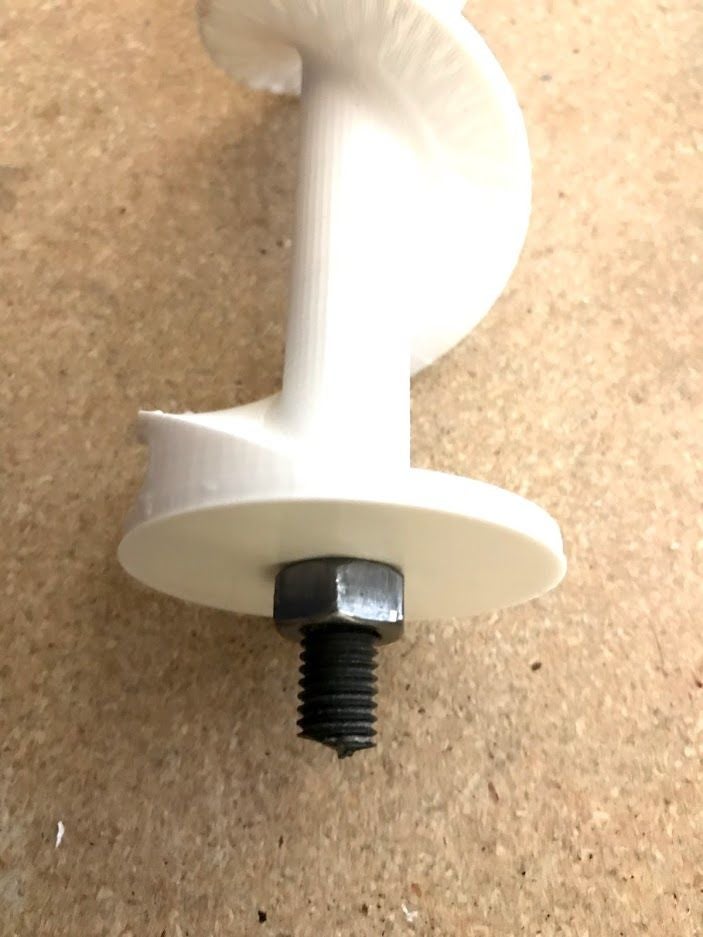
3. M8 Threaded Rod (6.5″) and Nuts (if needed to secure Auger to Rod)
7. Arduino UNO
8. Node MCU
10. Jumper Wires
11. Pocket Holes Screws
12. Wood Glue
13. Arduino Power Supply (9V-12V)
Tools Used:
– Circular Saw
– 3D Printer
– Pocket Hole Jig
– Soldering Iron (optional, but helpful)
– Heat Shrink Tubing or Electrical Tape
– Hot Glue Gun
Step 3: The Electronics and Code
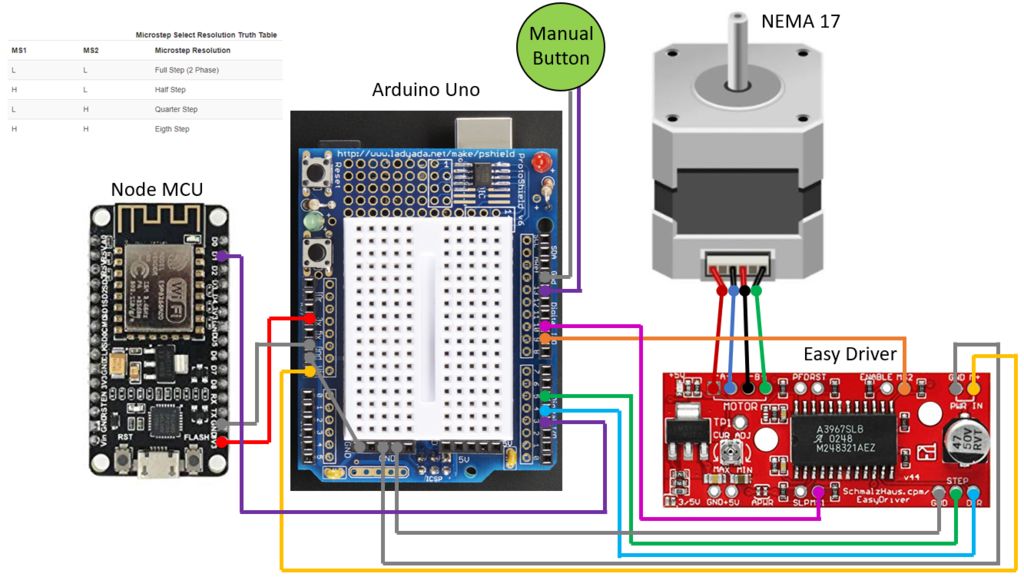
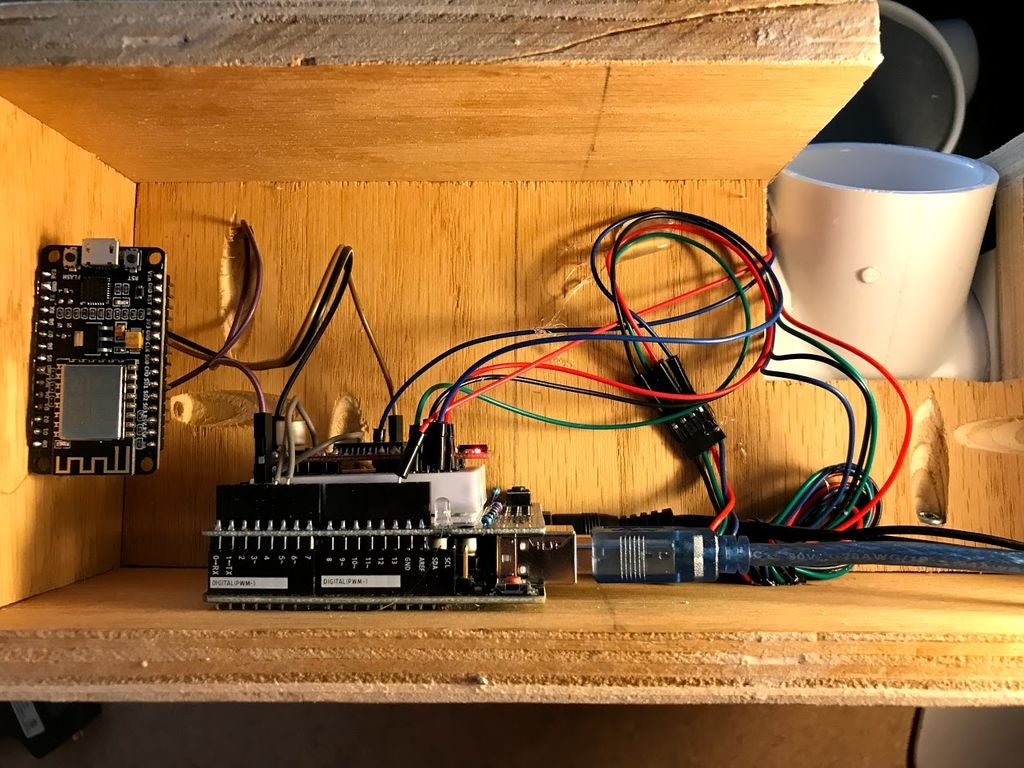
The electronics setup is fairly simple and follows a basic chain of command using an Echo Dot, Node MCU, Arduino Uno and stepper motor. The Node MCU has code on it that connects to your wifi network. Once it’s connected to the internet it broadcasts itself as a Wemo smart plug for the Alexa device to connect with. From here it waits for Alexa to send a command and then briefly sets one of the pins to HIGH which then triggers the Arduino to run the stepper motor. I also added a button for manual feeding. This allows me to dispense the necessary amount of food but bypasses using Alexa and is mainly used for testing.
I was unable to get Echo Dot (2nd gen) to discover the Node MCU initially. I found it to finally work after I downgraded both the “fauxmo” library and “esp8266” board to version 2.3.0 in Arduino IDE. Once I did this then I just proceeded with Alexa discovering new devices and it had no issues finding it.
The code for the Node MCU and Arduino are attached, along with an image of the circuit diagram. Note that you’ll have to change the board in Arduino IDE depending on which board you’re uploading the code to: Arduino Uno = “Arduino/Genuine Uno”, Node MCU = “NodeMCU 1.0 (ESP-12E Module)”. You’ll also need to modify the following variables in the code based on your setup (just search for the “UPDATE” comment):
Node MCU
– motorSteps
Arduino Uno
– WIFI_SSID
– WIFI_PASS
– deviceName (can also just be adjusted using Alexa routines, detailed in Step 6)
It’s easiest to test the electronics first before putting them in the structure since they’ll be more confined later on. I suggest making sure Alexa can connect to the device and trigger the motor before moving on to the structure.
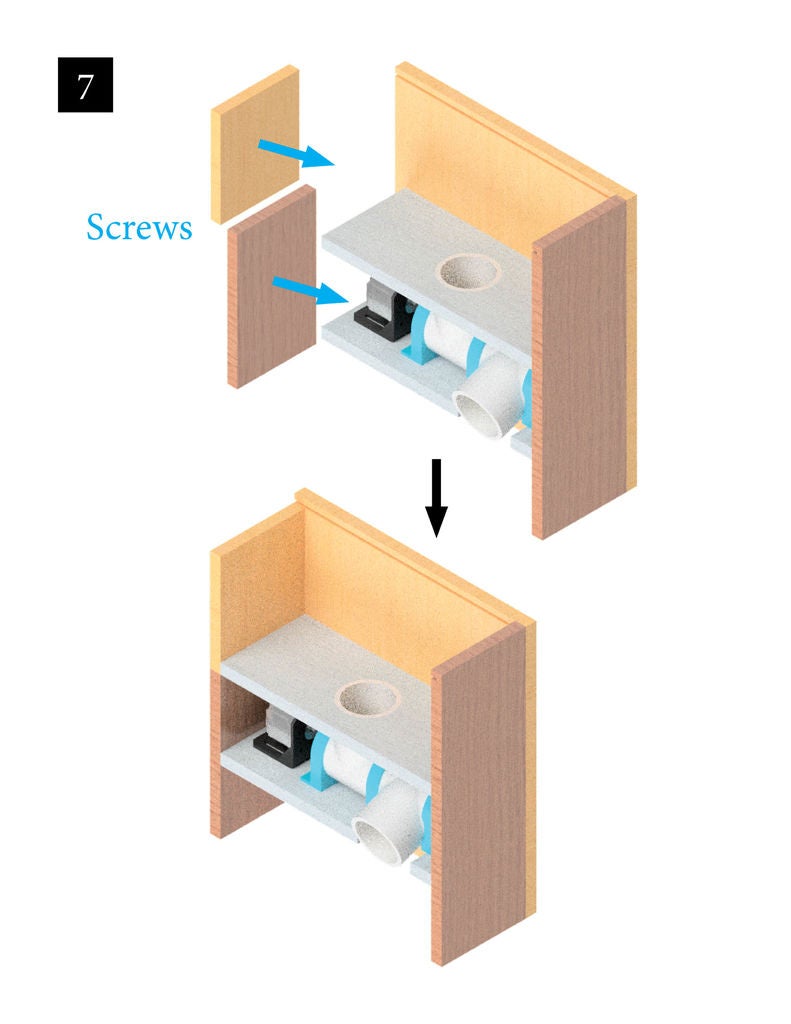
Step 4: Build the Structure
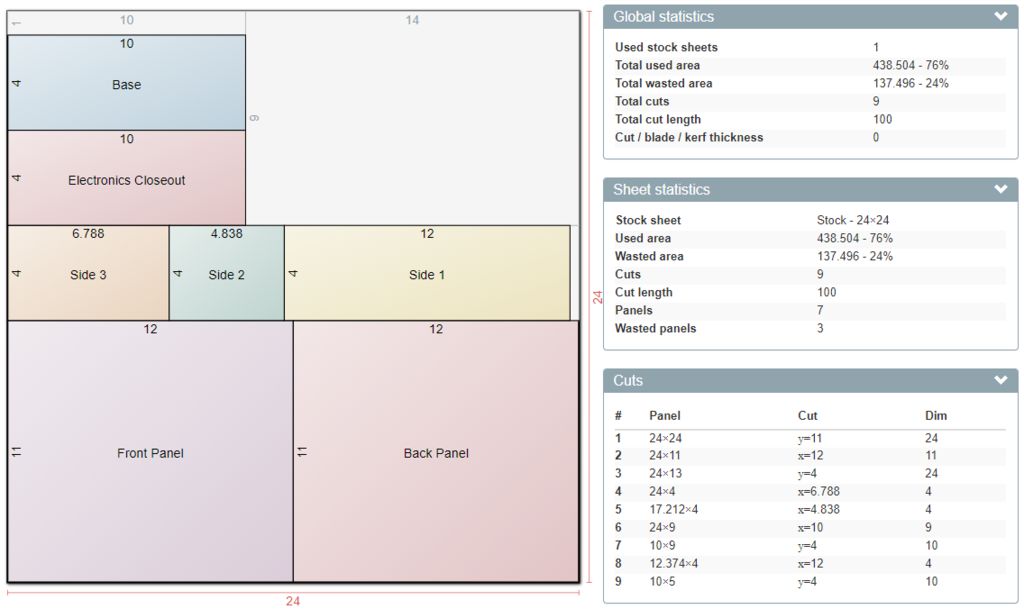
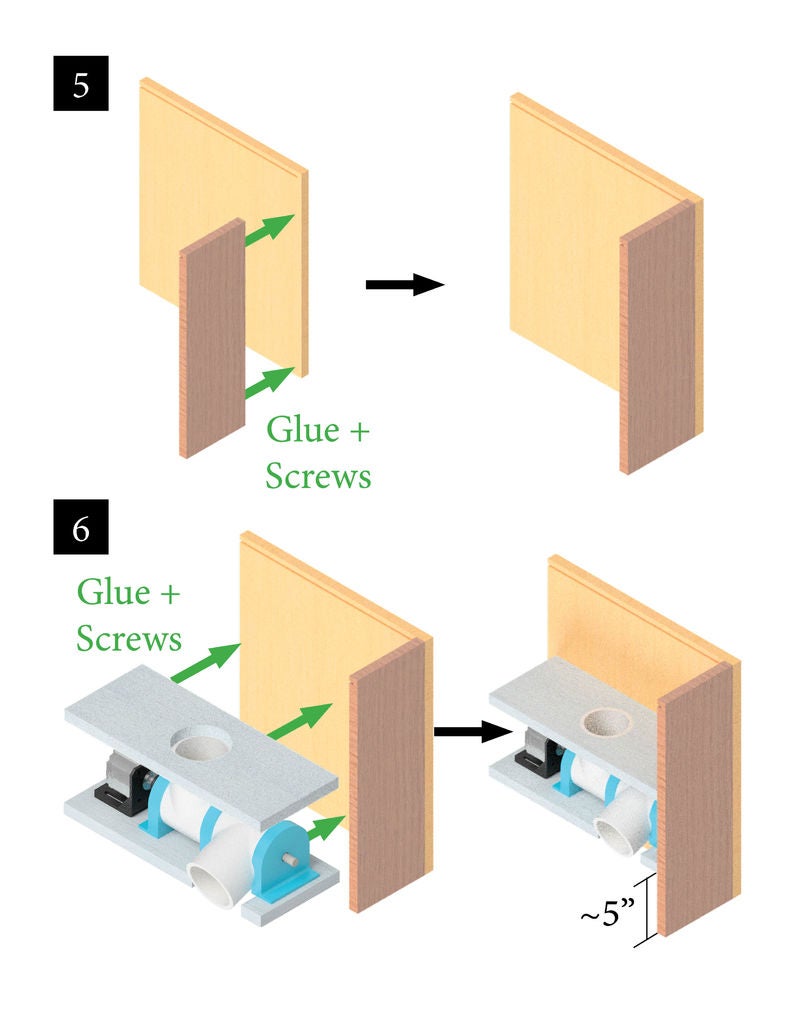
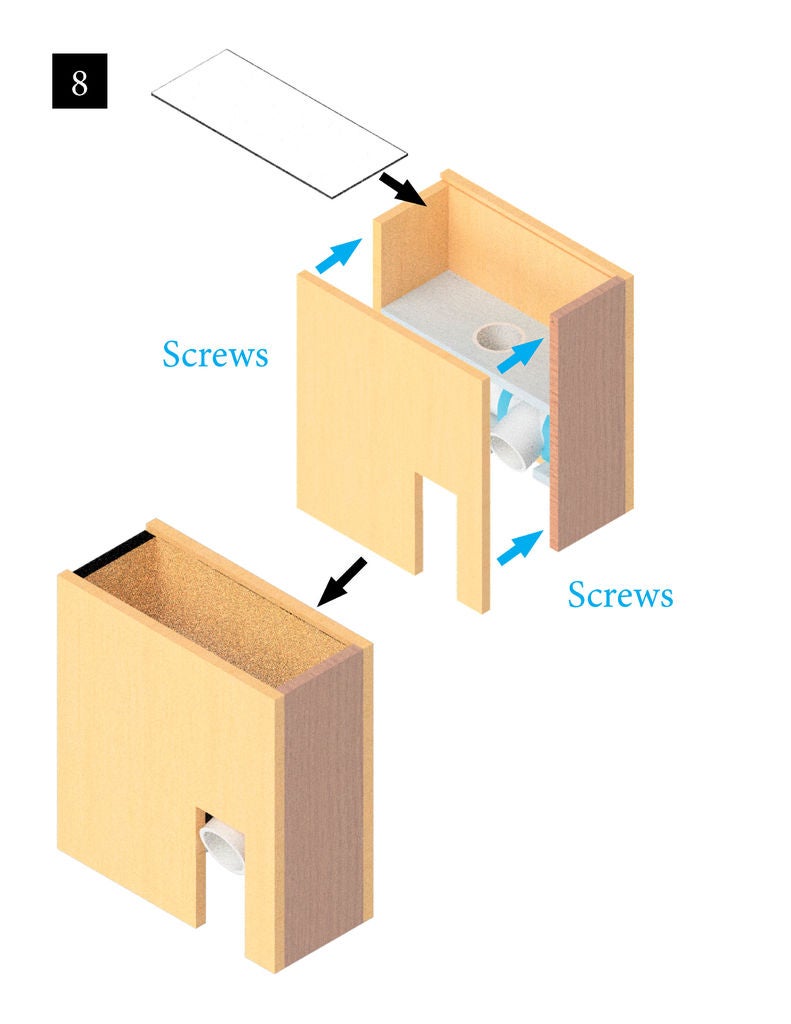
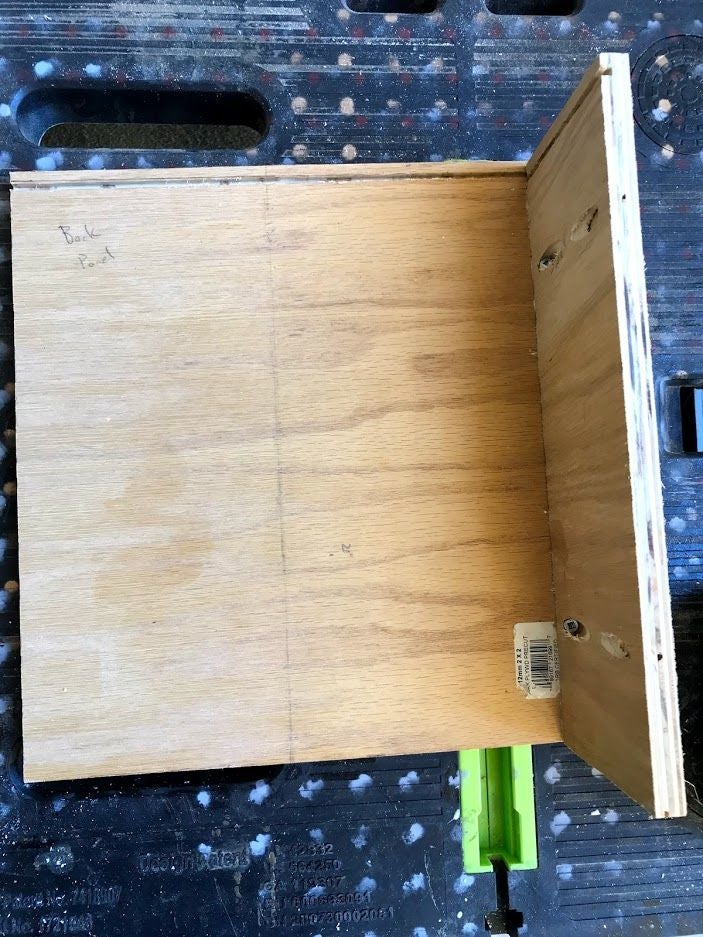
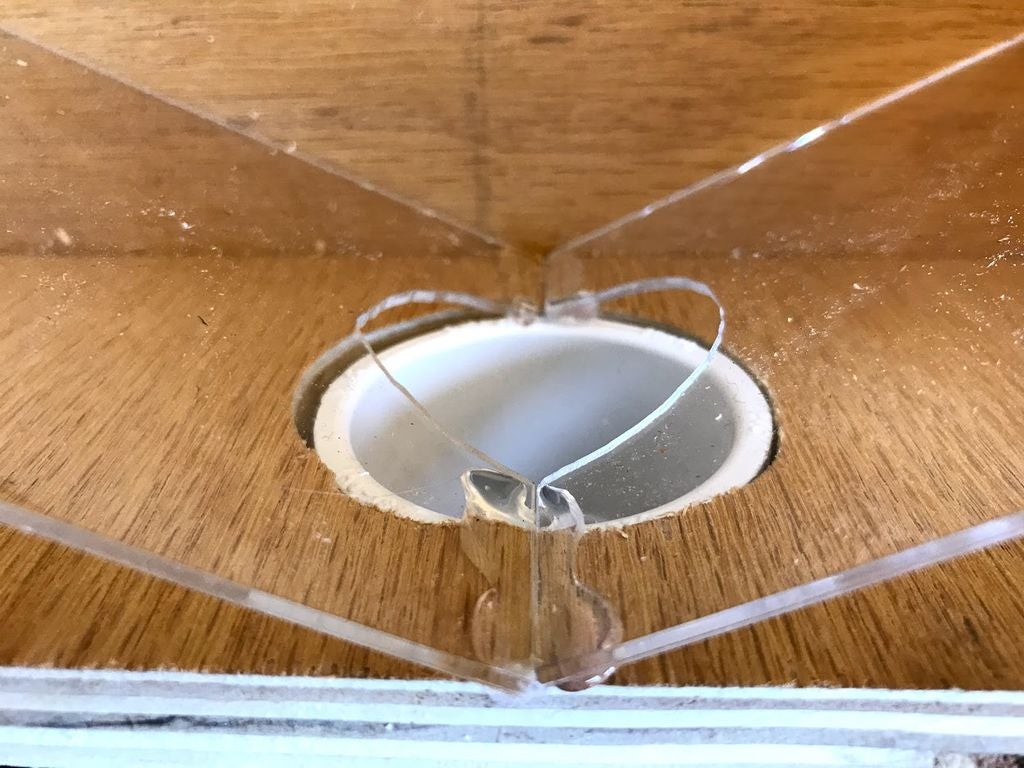
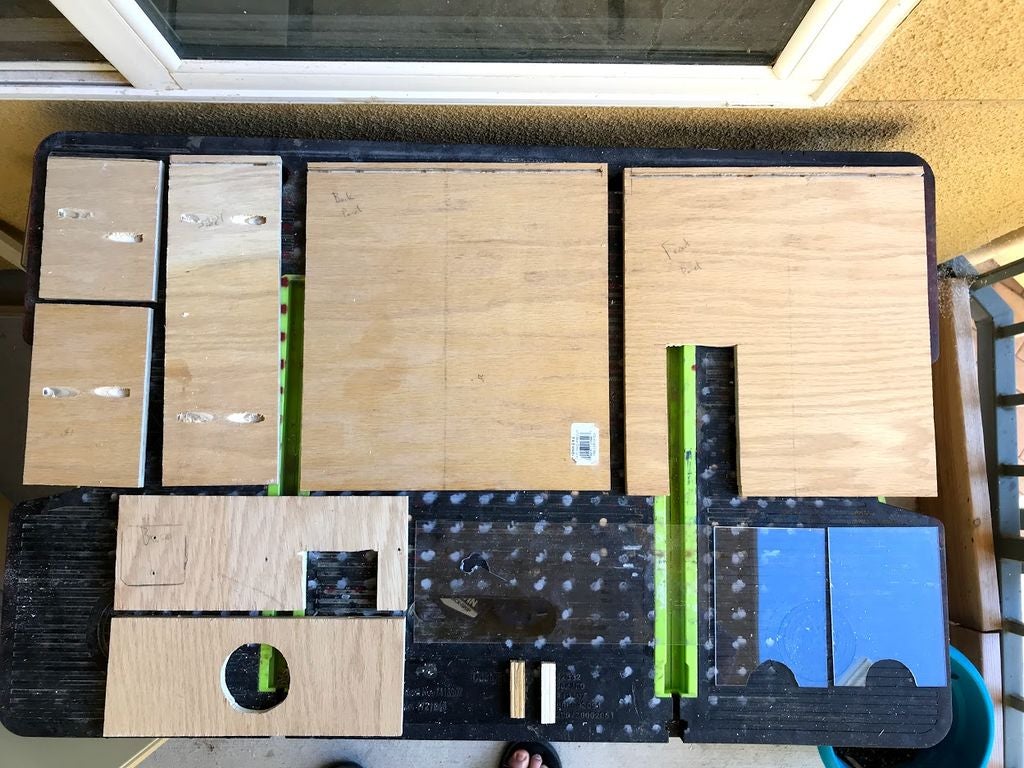
Cut out all the panel pieces from your stock plywood using your preferred method to break down plywood (i.e. table saw, circular saw, jig saw, etc.). I used a 24″ x 24″ x 1/2″ sheet and CutList Optimizer (or Workshop Buddy) to create the cutlist easily. Make sure to also cut out the rectangle notches in the Front Panel and Base and a circle in the Electronics Closeout to provide clearance for the PVC pipes. There’s also a ~1/8″ deep slot in the Front Panel, Back Panel and Side 1 for the acrylic to slide into.
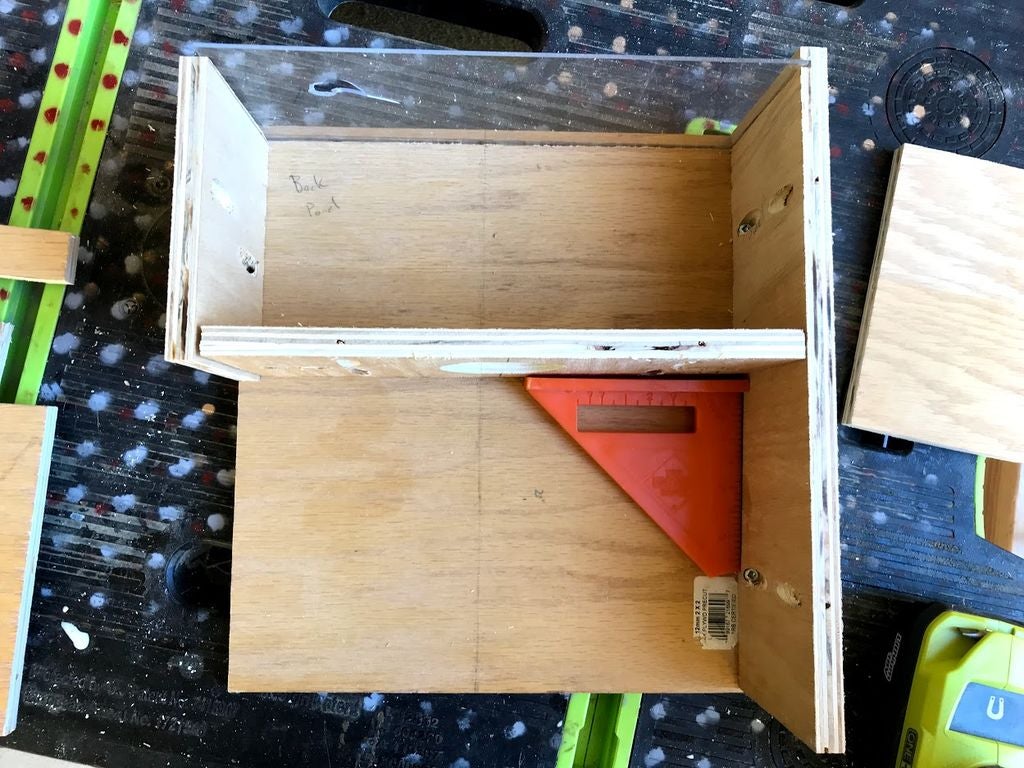
Next I chose to pre-drill pocket hole screws into the Main Base, Electronics Base, and the three Side pieces. You could also use normal screws and drill directly into the end grain of the plywood but be careful not to split the wood. Wood glue is helpful to make sure the structure stays together but make sure you can still access the electronics if you need to troubleshoot. My solution to this was attaching the electronics closeout panel just with screws so it can be removed later if needed. Note that you may also want to paint the structure or put a protective coating on it. This is also easiest done before everything is assembled.
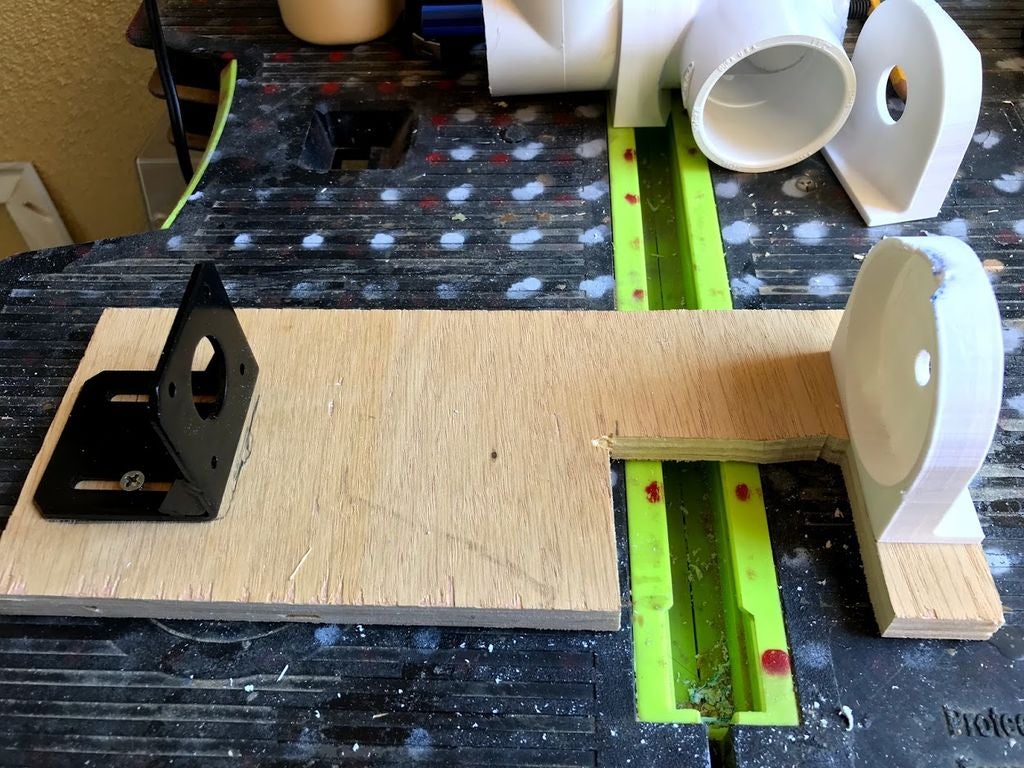
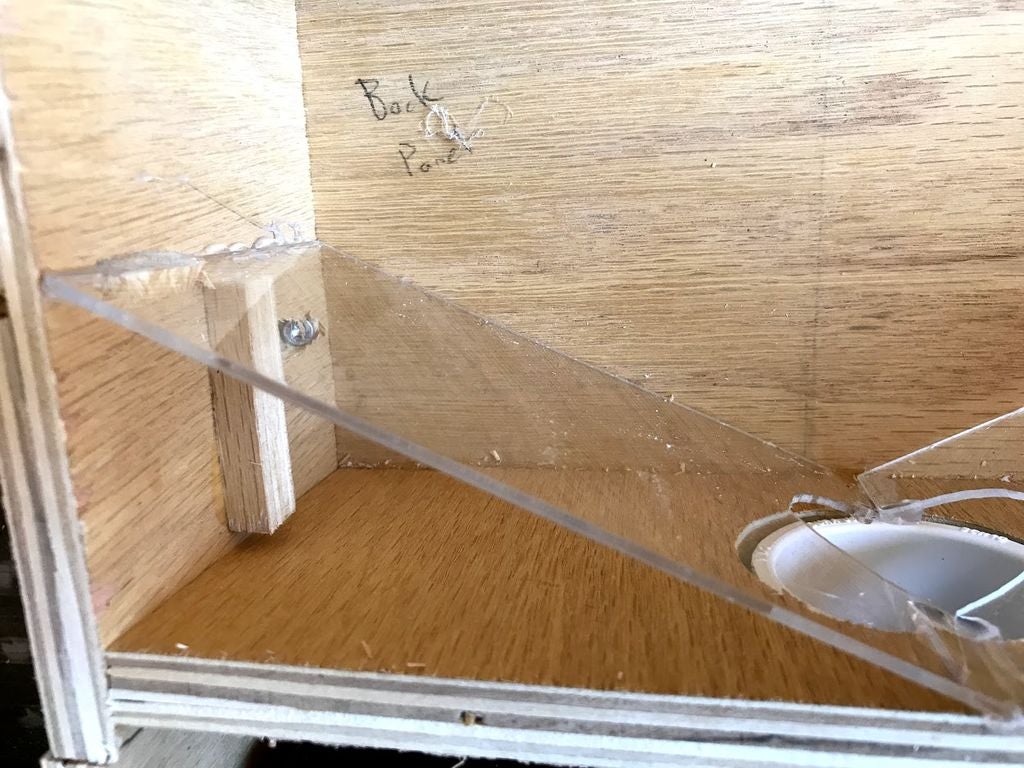
All dimensions and labels for the panels are attached. Note that I did add in some acrylic pieces to provide a slope for the dog food to slide into the PVC pipe. Also make sure the auger rotates smoothly within the PVC pipe. There’s enough clearance so it it’s getting stuck then check either end of the rod or make sure the pipes are straight.
Step 5: Feeding Time (6 PM)
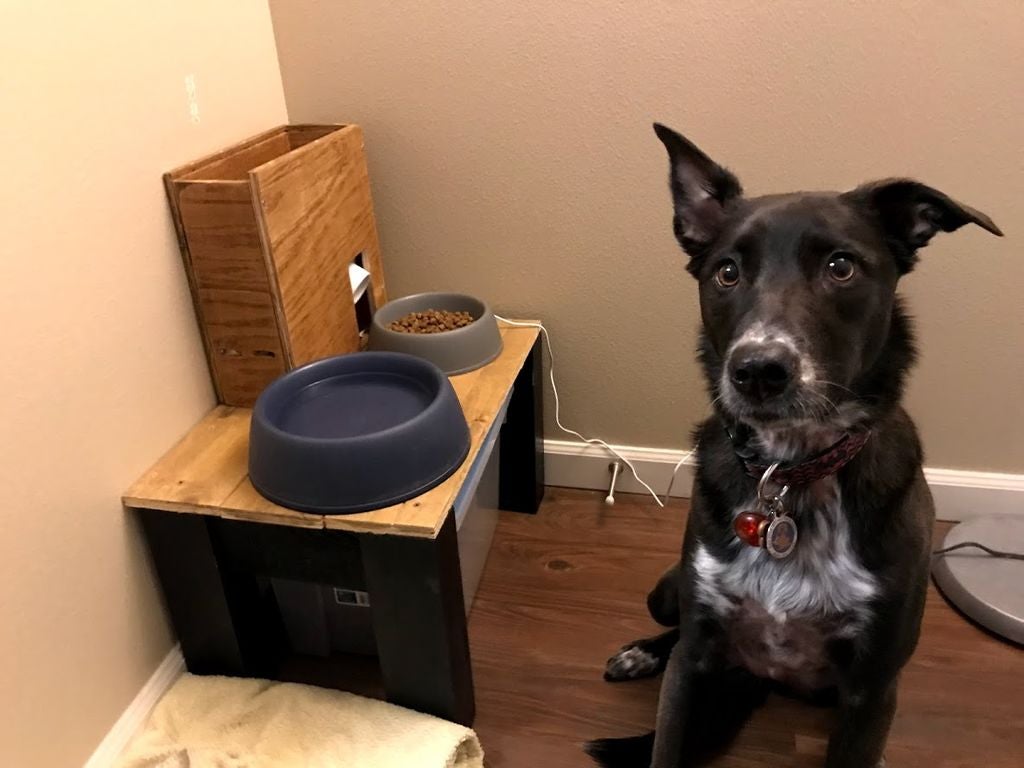
Once everything is assembled then it’s time to test the feeder. It’s best to first try the feeder when you’re at home to make sure everything runs smoothly before relying on it while out you’re out of the home. The first video attached was the initial run, however a kernel got stuck in the auger which caused the motor to stall (Bailey wasn’t too happy, but she got a treat which made her feel better). The second video shows the device working properly. The motor steps still need to be adjust slightly and I’ll need to add a ramp so the food goes into the bowl and not partially out.
Nonetheless, the mechanism works and the electronics work! Hopefully you’ve found this Instructable useful, whether it be for making your own dog feeder or some other sort of Alexa controlled device!
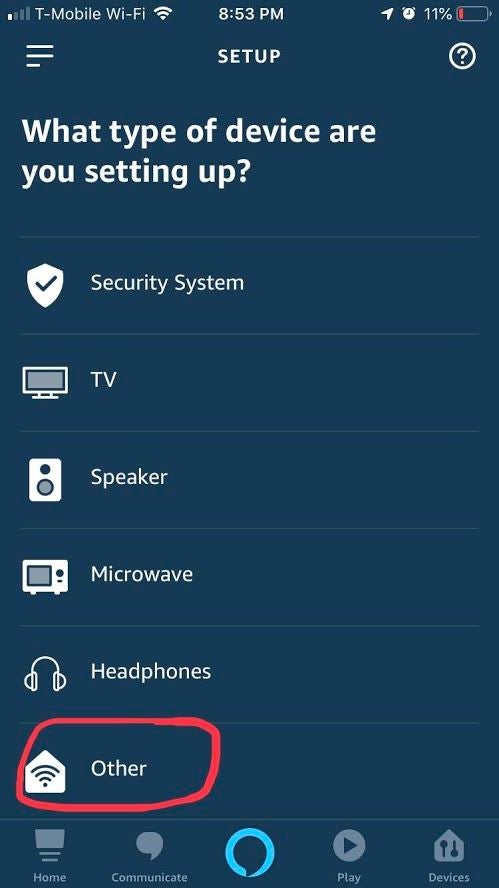
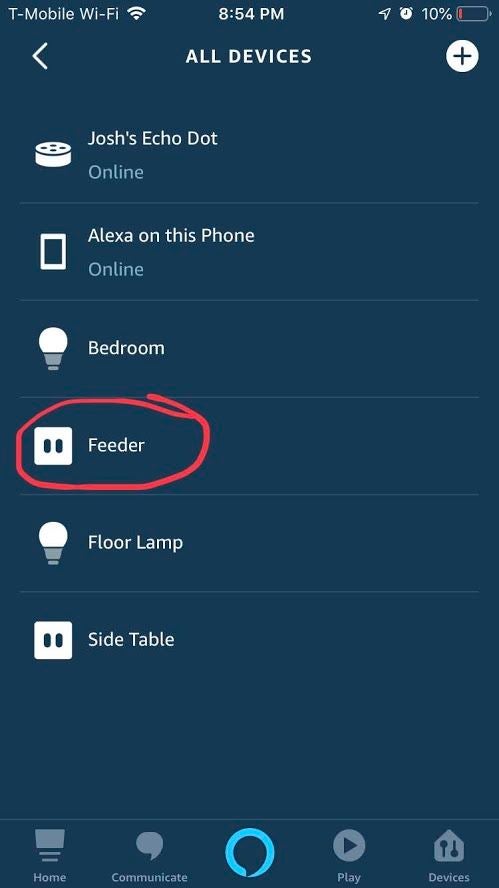
Step 6: BONUS: Setup an Alexa Routine
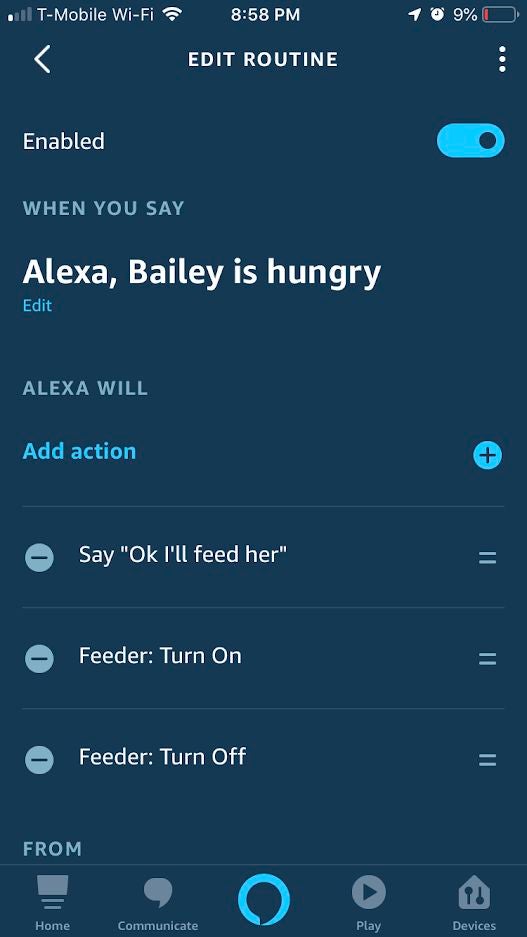
One of the great things about Alexa is that you can set up a routine that can control any of your smart devices. I could setup Alexa on a schedule so it feeds Bailey at 6 automatically every day, but we like to make her do tricks before she eats. I did decide to setup a routine though so I have a custom voice command for Alexa. In this case, all I have to say is “Alexa, Bailey is hungry” and the feeder will be activated and Alexa will respond “Ok I’ll feed her”. You could of course customize this to whatever you want though and this makes it easy to change the name of the device without really changing the name of the device and going into the code.